Wiring a Key Switch
This guide discusses Key Switch programming, which allows Konnected to trigger arming and disarming your traditional system
This guide will show you how to remotely arm and disarm a traditional wired alarm system using Konnected and a relay module to trigger a keyswitch zone.
To remotely arm/disarm using this method, you must have an unused zone on the traditional alarm panel that can be assigned as a keyswitch. This means you'll need the panel's installer code and a keypad capable of programming it.
A keyswitch zone type is supported by most traditional systems to arm/disarm the device with a momentary contact closure or opening. Think of a physical "key switch" that arms the alarm when you insert and turn a key. In this setup, we use a relay module, controlled by commands from your smart home platform to Konnected, to make that momentary connection.
Wiring Illustration
This page describes the latest model of the Konnected Alarm Panel Interface module, v2.1, which features a built-in relay. Click here for wiring diagrams for the older v2.0.
Alarm Panel v2
Alarm Panel Pro
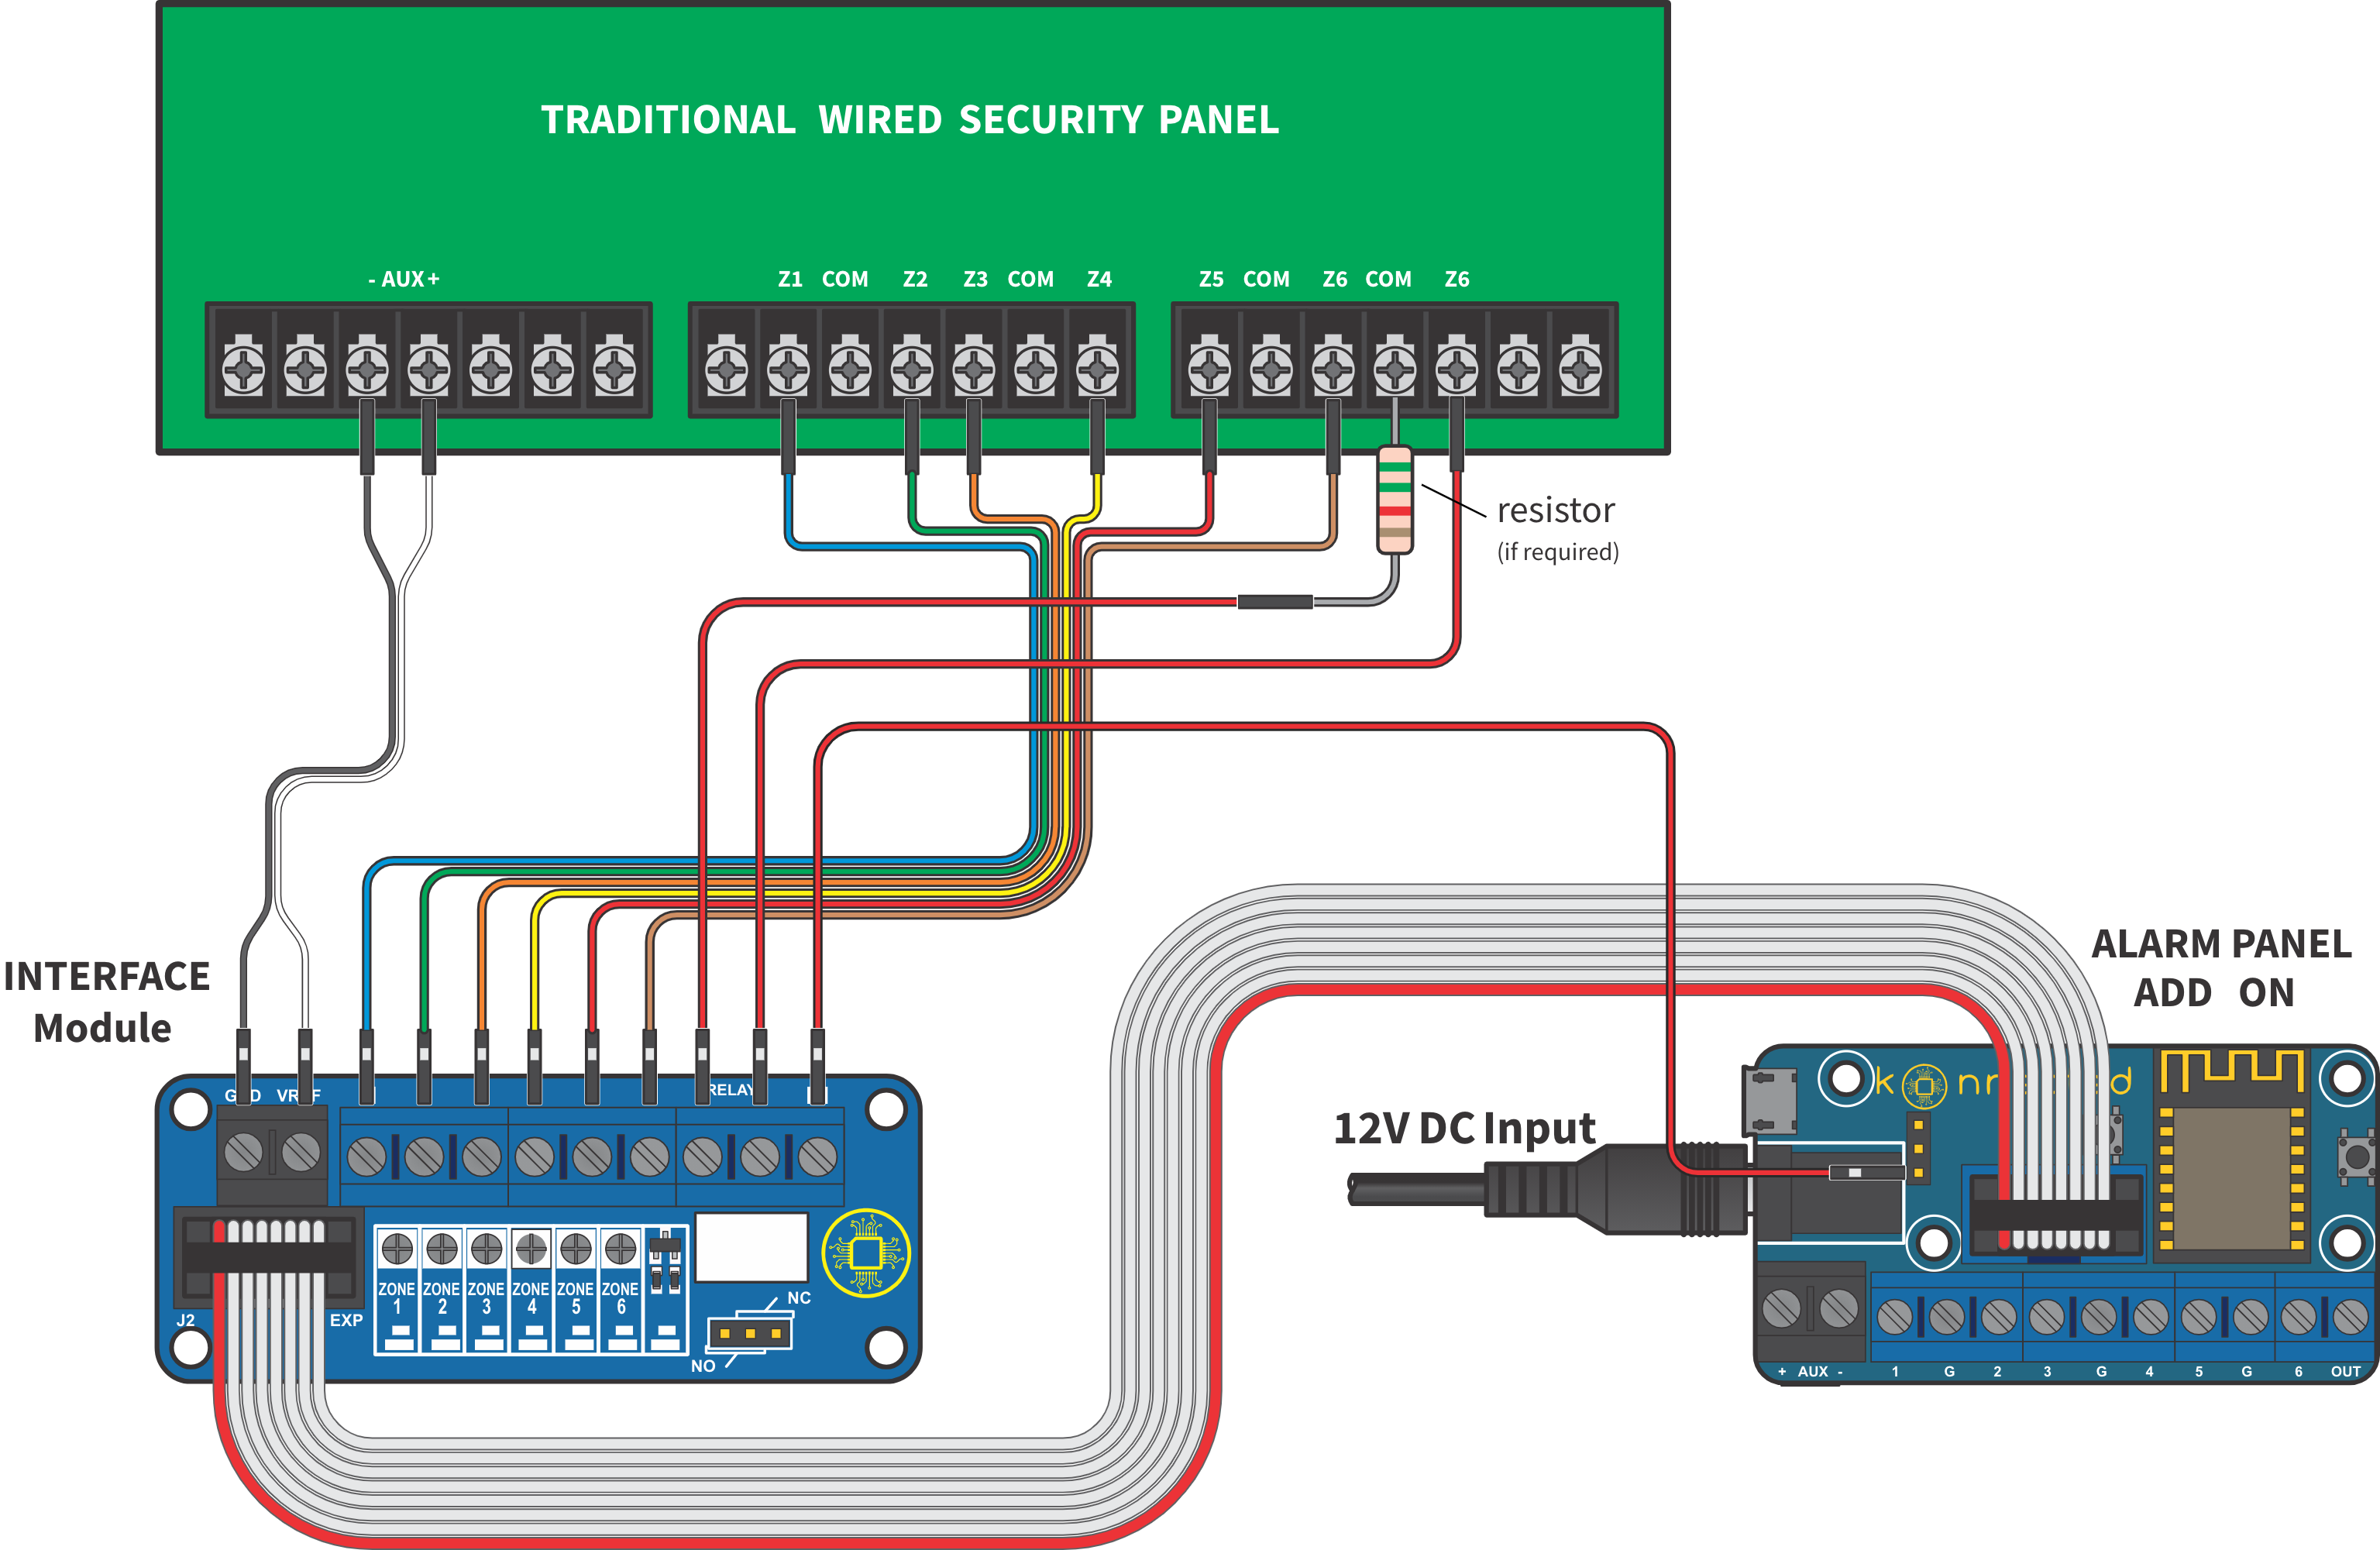
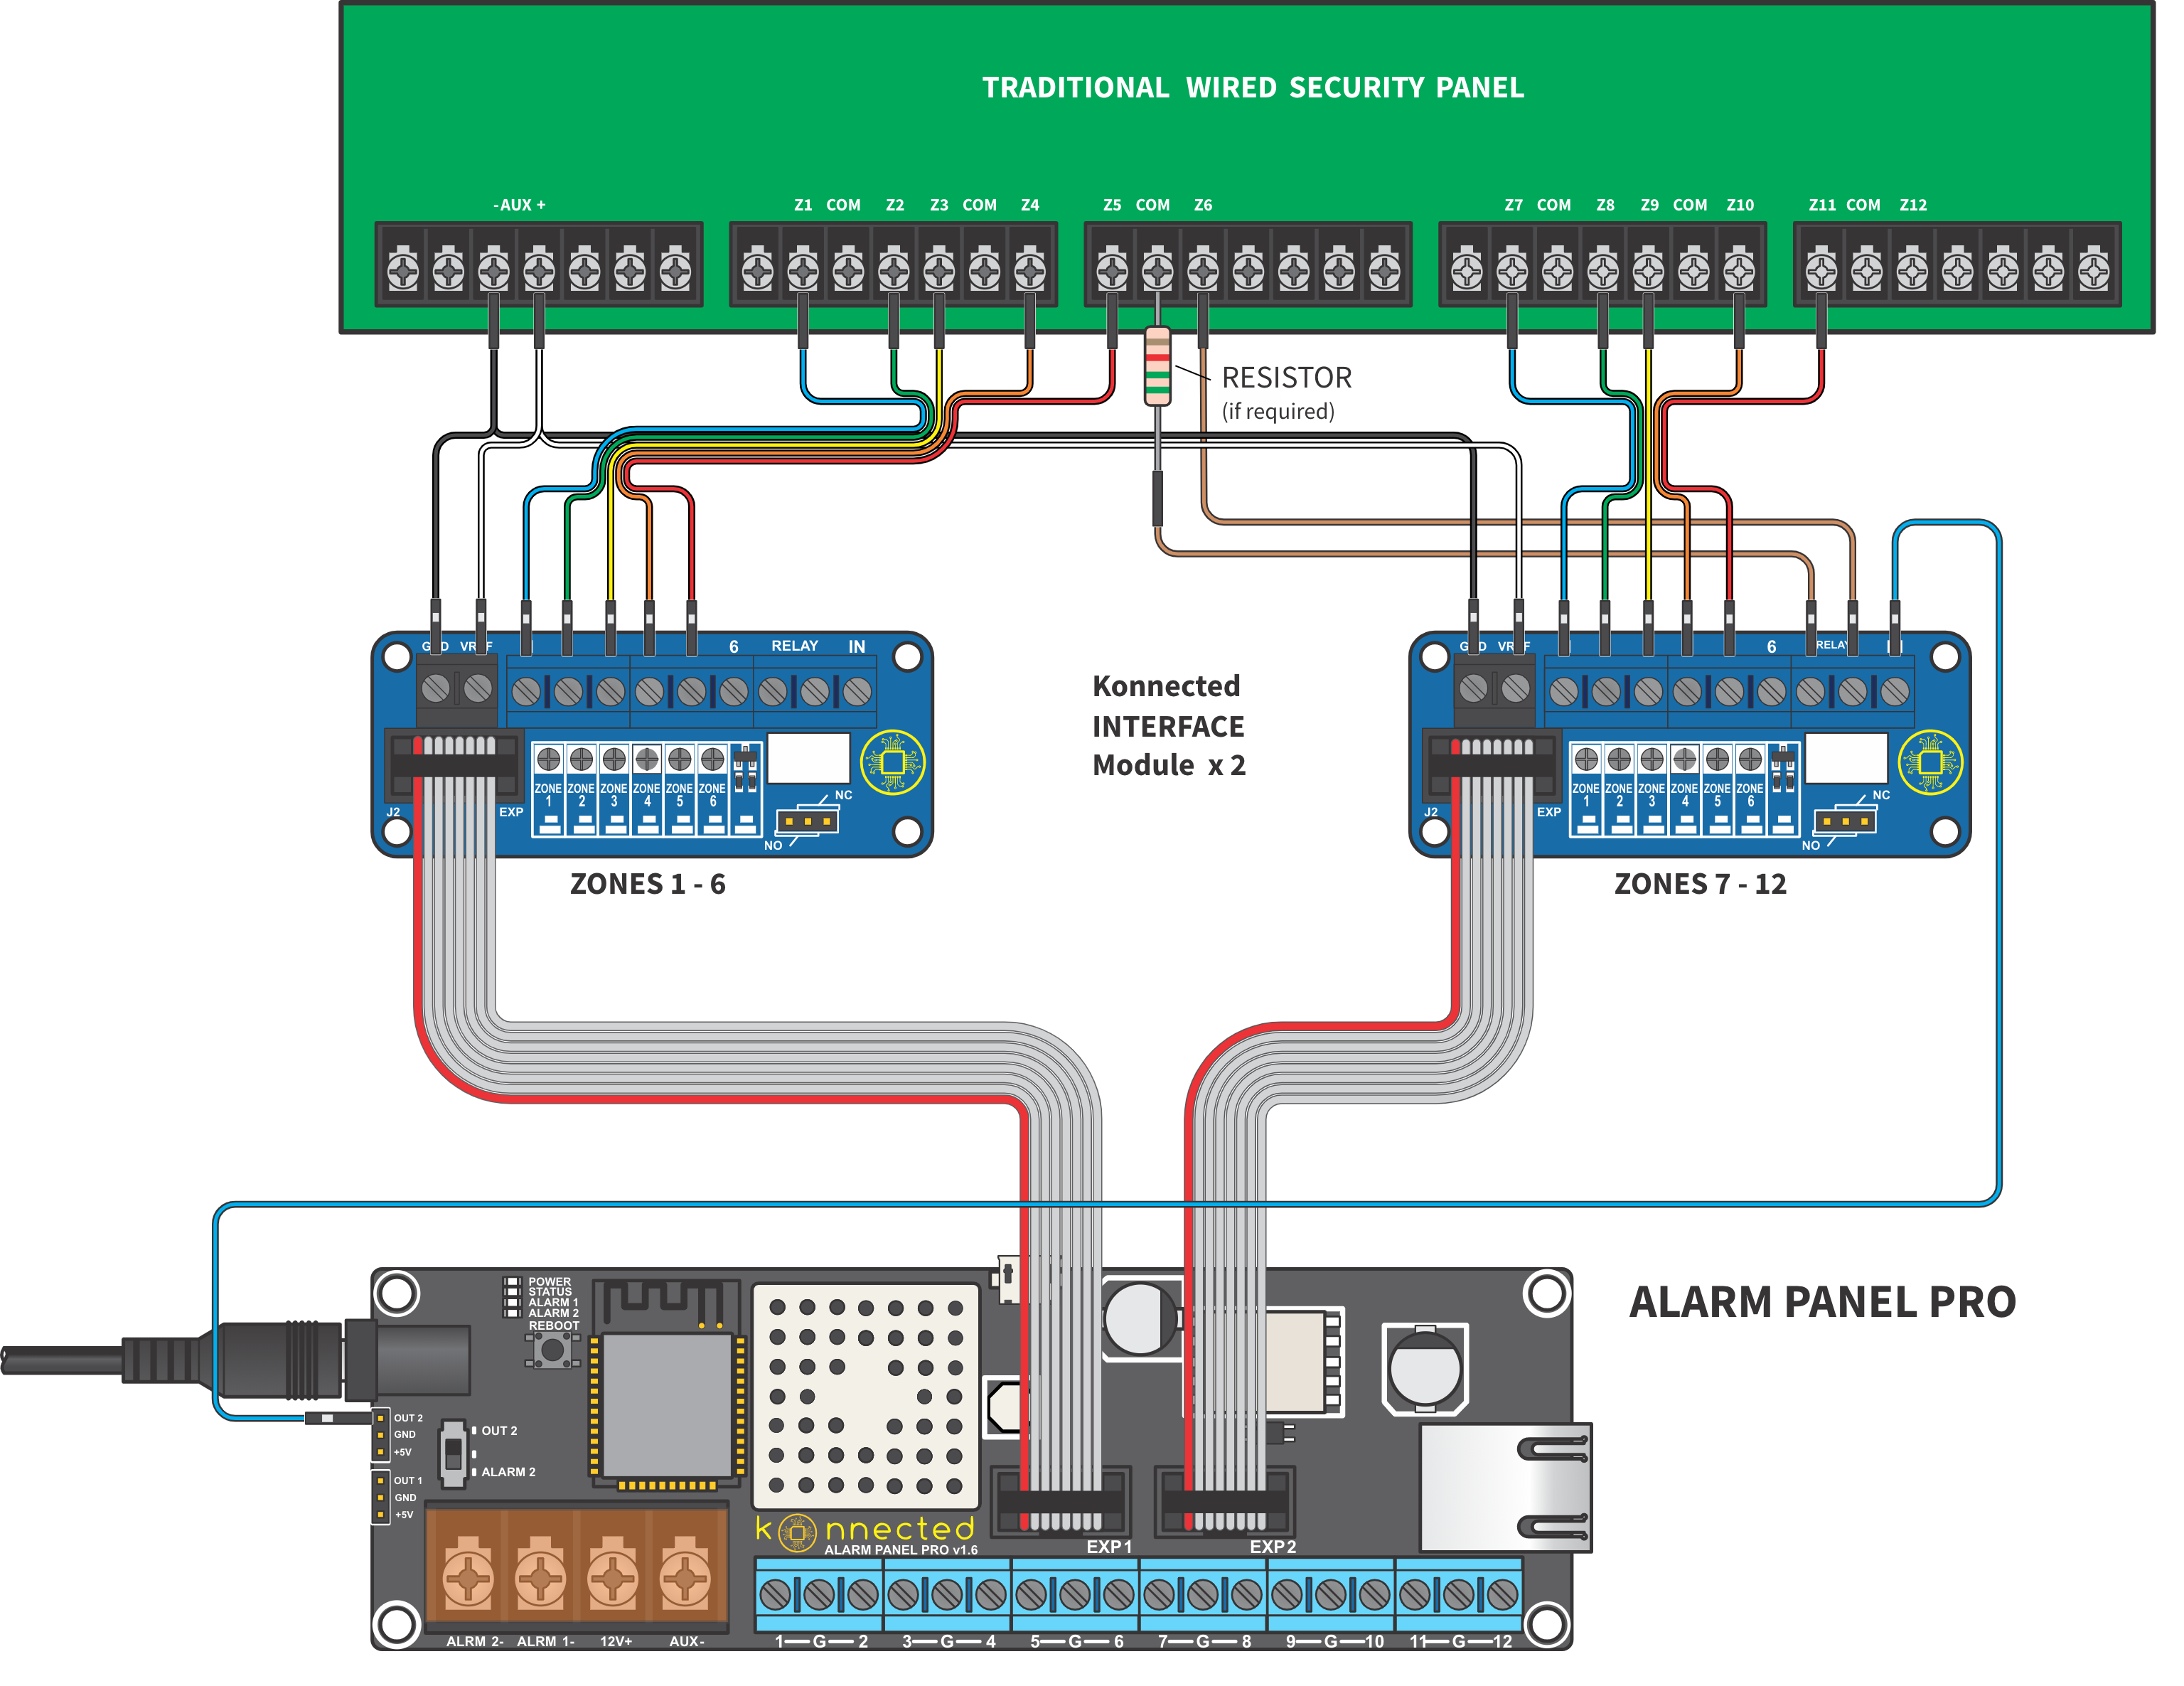
In this illustration, Zone 6 on the traditional panel is programmed as a keyswitch. The circuit across Z6 and COM is closed with the appropriate resistor for the panel via the NC/COM contacts on the relay. When signaled by Konnected, the relay momentarily opens this connection, triggering the traditional panel to arm or disarm.
- Identify an unused zone on the traditional alarm panel. Follow the alarm panel's programming guide to program this zone as a keyswitch zone.
- Connect the keyswitch zone and its adjacent COM terminal to the terminals marked RELAY on the Konnected Alarm Panel INTERFACE module.
- If the traditional panel requires a specific resistance value, wire the appropriate resistor inline with either the keyswitch zone. Not all panels require a resistor, and some can be programmed to work with or without one.
- Connect IN terminal on the INTERFACE module to the OUT terminal or pin on the Konnected Alarm Panel, or either OUT1 or OUT2 pin on the Alarm Panel Pro.
Configure the OUT zone
In your smart home platform, configure the OUT zone as a Switch or Momentary switch to activate the relay.
SmartThings: Use the Konnected app to set up
Built-in Dry Contact Relay
The Alarm Panel INTERFACE module v2.1 features a built-in dry contact relay that can be used to actuate a keyswitch or many other things:
- Garage door opener
- Electronic door strike
- LED light
- Sounder or strobe
- Any circuit up to 2A 30VDC or 0.3A 125VAC
The built-in relay is activated by applying 3.3V to the IN terminal, and is designed to be triggered from the Konnected Alarm Panel Add-on or Konnected Alarm Panel Pro OUT terminals.
Normally Open vs. Normally Closed
Depending on the capabilities of your traditional alarm panel, the keyswitch may need to be configured Normally Open (NO) or Normally Closed (NC). Normally open means that the circuit is open until the trigger voltage is applied to the IN terminal, which causes the relay to close.
Move the jumper cap on the Alarm Panel INTERFACE module to the NO or NC position to set the desired behavior.

