This article is designed to guide you through adding smart monitoring and control to your garage door opener with the Konnected Smart Garage Door Opener - White version. With clear, step-by-step instructions, we'll guide you through mounting, wiring, connection, and integration with your preferred supported smart home platform.
Product Information 1
Key Features and Benefits
- Simplified Installation: Retrofit your existing garage door opener with an easy installation process.
- No Special Codes Required: Streamline setup without the need for complex programming.
- Seamless Integration: Works with most existing garage door openers and smart home platforms without needing additional equipment.
- Smart Features: Gain remote access, receive real-time alerts, and set automations for your garage door.
- Expandable Solution: Suitable for various home setups, offering flexibility in smart home integration.
- Universal Access: Allow every household member to control and monitor the garage door through a smart platform.
Important Information
- Sensor Placement: Ensure optimal sensor placement for accurate garage door status detection.
- Compatibility Check: Verify the compatibility of your garage door opener with the Smart Garage Door Opener White (v2) before installation.
- Height Considerations: For garages with ceilings higher than 6 feet from the rolled-up door, consider adding a wired sensor for improved accuracy.
What’s in the Box?
Your Smart Garage Door Opener White (v2) package includes:- Smart Garage Door Opener
- Power Adapter
- Hook-Up Wire
- Mounting Screws
- Wall Sticker
Table of Contents 2
Setup Overview
The following steps provide an overview of the steps involved in the setup of your Konnected Smart Garage Door Opener White (v2):
- Initial Setup
- Connect to Wi-Fi
- Find and Install the Konnected App
- Platform Setup
- Cloud Setup (for SmartThings and Alexa)
or - Home Assistant (Local Setup)
or - Hubitat (Local Setup)
- Cloud Setup (for SmartThings and Alexa)
- Physical Setup
- Check Wi-Fi Signal in Garage
- Choose a Mounting Location
- Connect the Control Wire
- Power it up
- Test Opening and Closing
Initial Setup 3
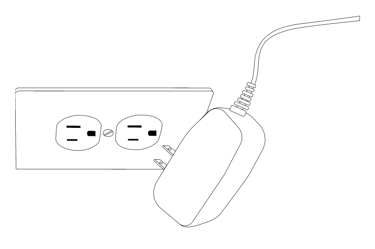
Connect to Wi-Fi
Connect your new GDO to Wi-Fi before installing it in the garage. Power on the device by plugging in ht included power adapter. Using a smartphone or computer, connect to the Wi-Fi network:
garage-door-xxxxxx
if the Wi-Fi connection page doesn't open automatically, then open your browser and go to:
http://192.168.4.1
Select your Wi-Fi network and enter your password: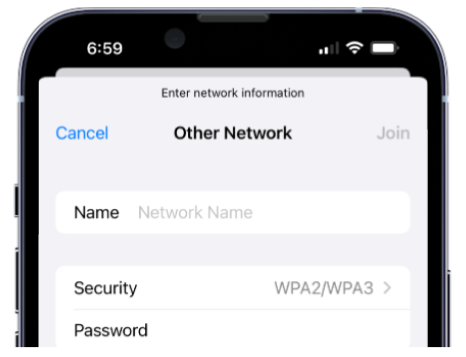
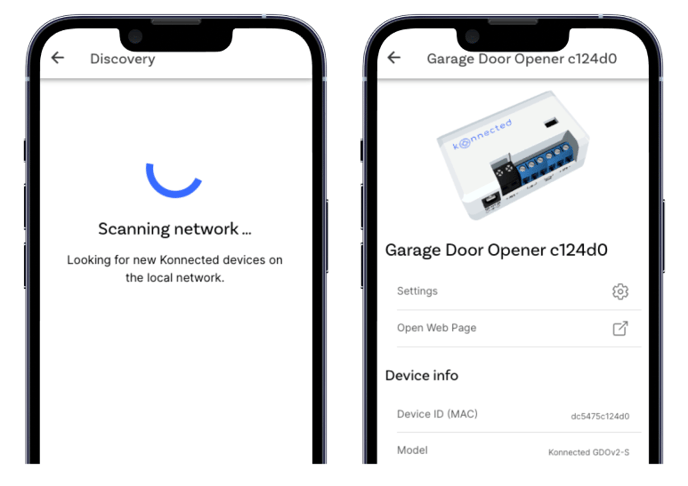
Find it Online
Download and install the Konnected app to easily discover and set up your GDO.

NOTE: You can also go to the device's IP address directly (without needing the Konnected app) by finding it in your router's app.
Go to Add New Device from the app menu to search for the device on your network.
Platform Setup 4
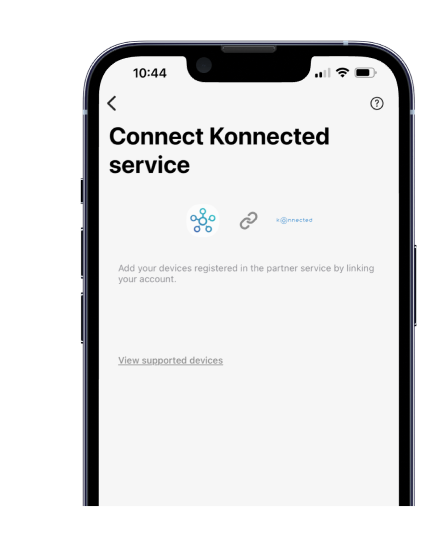
Cloud Setup
Integration with SmartThings and Alexa is provided by the free Konnected Cloud service. Use the Konnected app to sign up for Konnected Cloud.
Get the App
Configure the Device
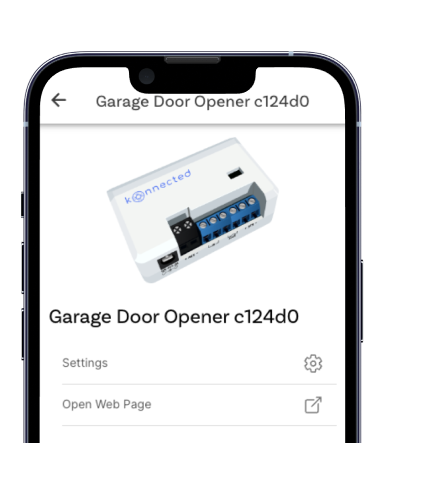
Tap Settings to configure your device for Konnected Cloud.
Then follow the steps in the app to update the device firmware.

In the SmartThings app, tap the + icon and Add device > Partner device > By brand > Konnected
Follow the steps to link your Konnected Cloud account to SmartThings

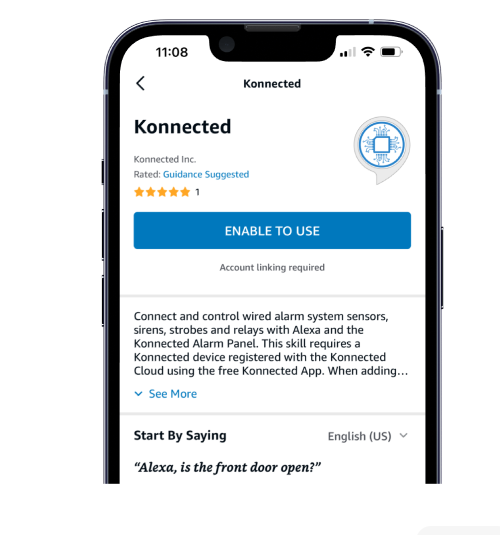
Install the Konnected skill for Alexa from the Alexa Skills store.
Follow the steps to link your Konnected Cloud account to Alexa.
Local Setup 4.1

 After connecting your GDO to Wi-Fi, Home Assistant should discover it automatically.
Open Home Assistant (mobile app or web interface) and look for New devices discovered in the Notifications pane.
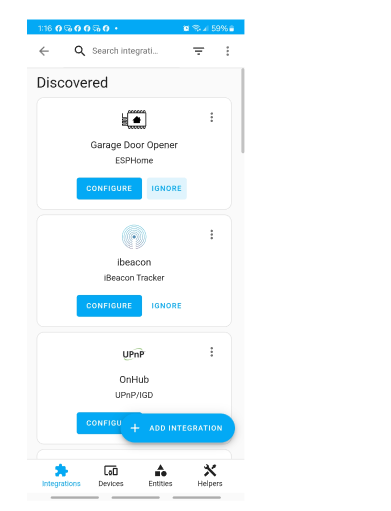
The GDO uses the built-in ESPHome integration. If it's not automatically discovered, go to Settings > Devices & Services > Add Integration > ESPHome to add it manually by IP address.
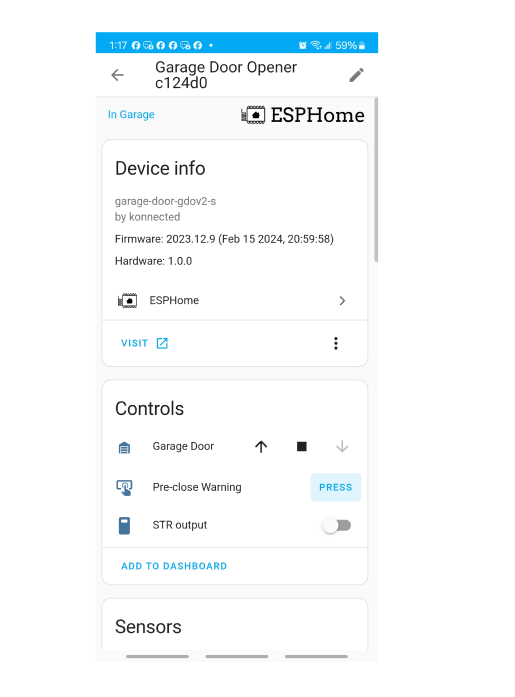
Now you can find the device named Garage Door Opener in Settings > Devices & Services > Devices.
The main control is the Garage Door entity. Tap Add To Dashboard for easy access.
Calibrate the optical sensor in the Configuration section.
Customization
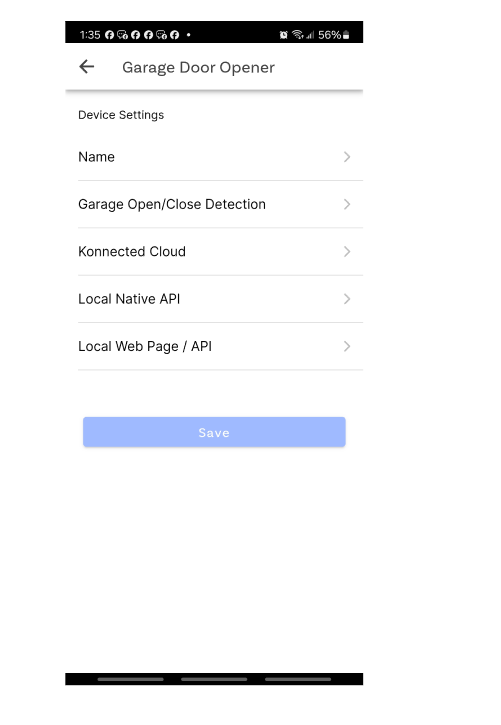
There are two ways to customize the settings of your new GDO.
Use the Konnected App to customize and update your GDO firmware using our service that builds ESPHome configs for you!
Or, install the ESPHome Dashboard Add-on for Home Assistant and adopt your device. Check our support site for ESPHome config tips.

Local Setup 4.2

Install the driver for the Konnected GDOv2-S using Hubitat Package Manager
Or download and import the GarageDoorOpenerGDOv2S.zip file from our open-source drivers on GitHub: https://github.com/konnected-io/konnected-hubitat/releases
Next, in Hubitat go to Devices > Add a device. Then choose Virtual.
Fill in a Device Name. The Device Network ID should be auto-populated for you. Select Konnected Garage Door GDOv2-S from the Type drop-down. It will appear at the bottom of the drop-down under the User heading. 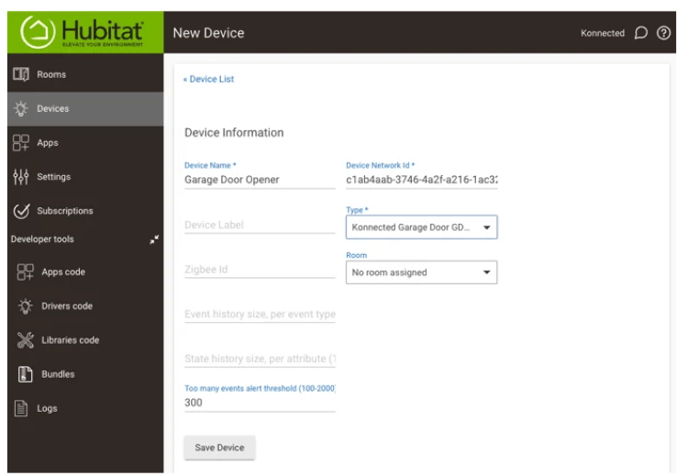
Find the IP address of the device on your local network. You can find this in the Konnected app, or by looking in your router's app for a device named garage-door-XXXXX or konnected-XXXXXX. Enter the IP address in the device's Preferences section and Save Preferences. 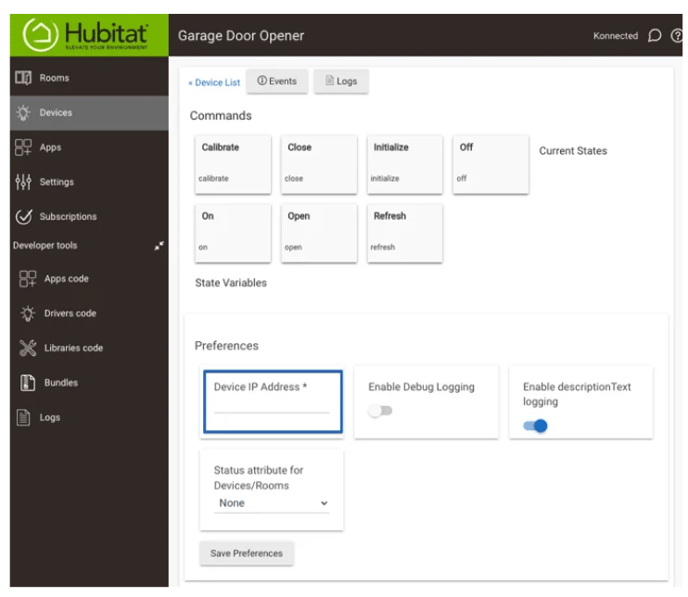
After saving the IP Address, Hubitat will connect to your device and automatically populate states! Your Garage Door Opener is now ready to install and use.
Tap the Calibrate button when the garage is open to calibrate the optical laser sensor.
Get to know your GDO 5
Physical Setup 6
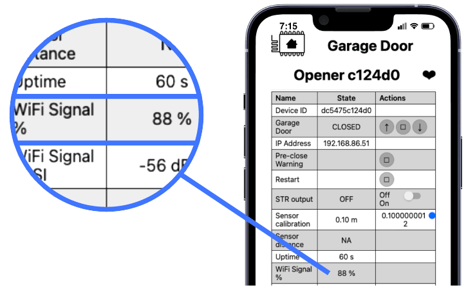
Check Wi-Fi Signal in Garage
Move the device into the garage and plug it in.
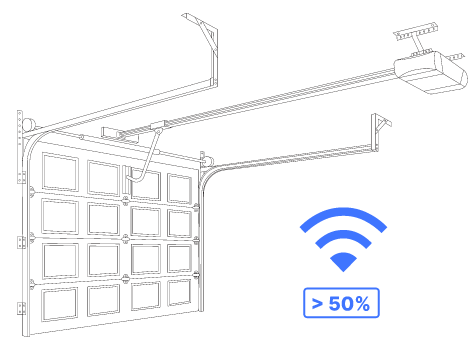
Tap Open Web Page to see the internal web interface of the Konnected GDO. Scroll down to Wi-Fi Signal % to see the signal strength.
Ensure that the signal strength is at least 50% for best results.
Choose a Mounting Location
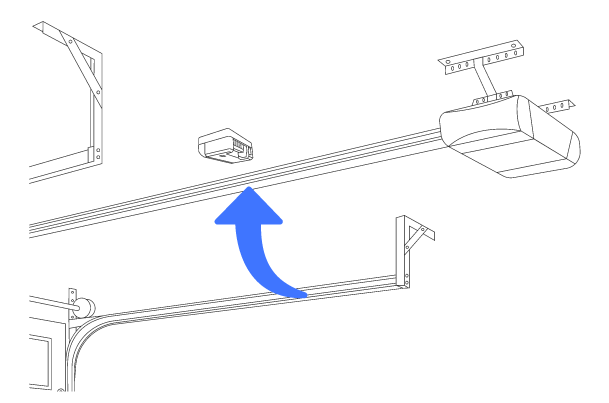
Choose a location so that if you are standing directly underneath the Konnected GDO looking up, and the garage door is opened, the rolled-up garage door will completely block view of the device. 
Choose a location that's at least 2ft away (0.6m) from any track, chain, beam or support.
Make sure the power plug cord and hookup wire is long enough to reach a ceiling outlet and the garage door opener motor before mounting the device!
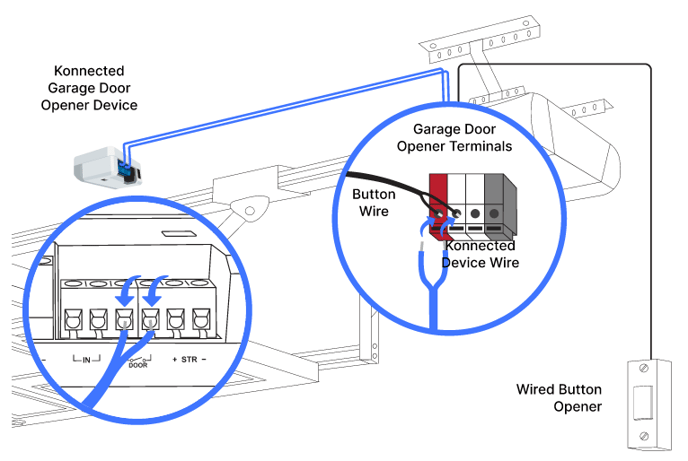
Connect the Control Wire
CAUTION: Unplug the garage door opener before you begin!
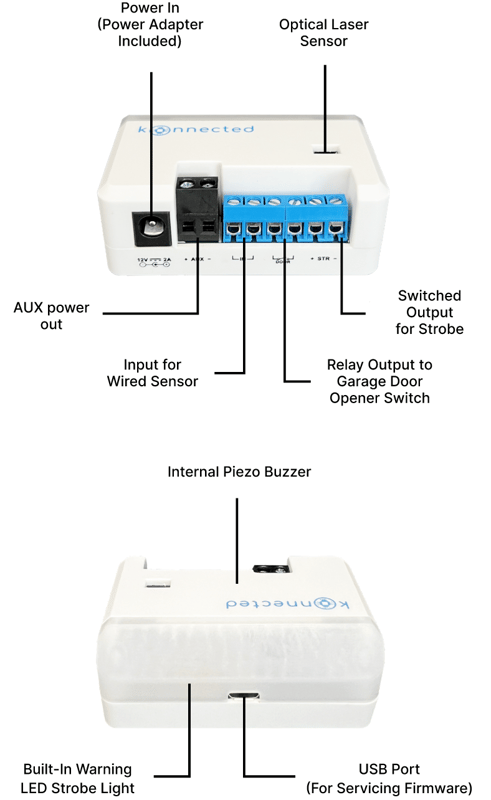
Optional: Connect Wired Sensor
If desired, you can use a wired contact sensor (sold separately) or limit sensor (may be installed on your garage opener) instead of or in additional to the built-in optical sensor. 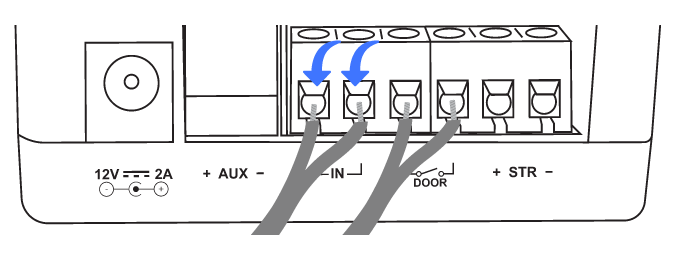
Power It Up!
Plug in the Konnected GDO and the garage door opener unit.
Calibrate Optical Laser Sensor
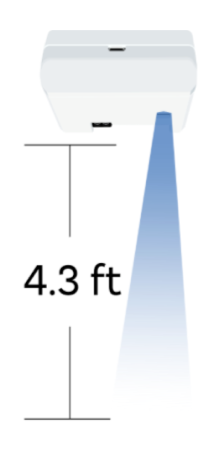
Use the Konnected app or the device's internal web page to calibrate the optical sensor. The sensor calibration should be the distance between the device and the garage door when it's open.
The sensor works best when there's less than 5ft from the top of the garage door to the ceiling.
Test Opening and Closing
Use your smart home app or the device's internal web page to test the open and close functions and check that the door stratus is read correctly. 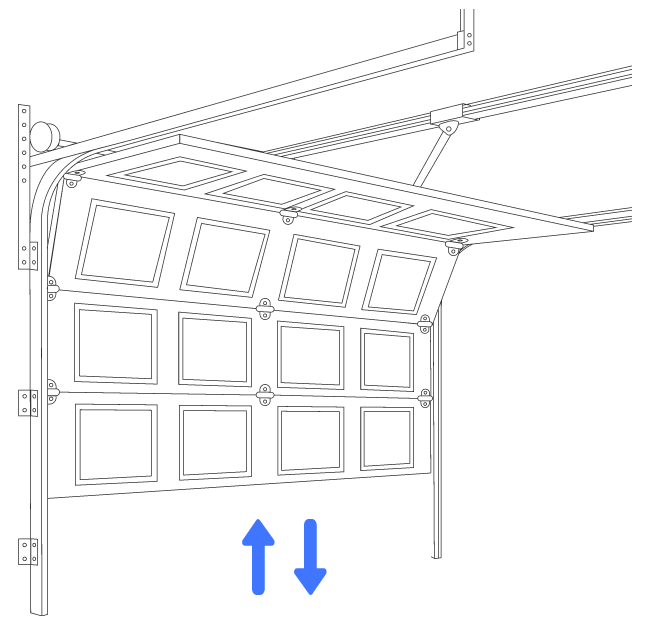
By default, the device uses the built-in optical laser sensor to determine the opened/closed status of the garage door. To use a different detection method, adjust the firmware configuration in the Konnected app.
An audible & visual warning will activate for 5 seconds before the Konnected device triggers the garage door to close. This is a required safety feature and cannot be disabled.