Konnected Alarm Panel Pro Interface Kit Installation and Setup Guide (OLD VERSION)
The Konnected Alarm Panel Pro Interface Kit: Modernize Your Existing Alarm System
Product Information 1
Key Features and Benefits
- Higher Quality Hardware: Based on the ESP32 microcontroller, a newer and more powerful option (as compared to our 6 zone WiFi boards) that will allow future Matter standard compatibility and Matter integration.
- Retained System Functionality: Allows your current alarm system to function with smart home capabilities, maintaining its original features.
- Advanced Smart Home Integration: Compatible with leading smart platforms for extensive control and automation possibilities.
- Remote Management: Enables monitoring and control of your security system from anywhere, ensuring peace of mind.
- Open-Source Flexibility: Utilizes open-source software for ongoing enhancements and customization.
- Robust Connectivity Options: Offers Ethernet and PoE for a more reliable and versatile setup.
Important Information:
- Side-by-Side System Integration: This kit operates alongside your existing alarm system, keeping keypads and sirens active.
- Check Your Alarm System's Capabilities: Verify that your existing system supports at least 2 programmable outputs and a key switch, and that you have the ability to modify the programming (you have the "master installer code/programming code/installer programming code").
- Network Enhancements: Supports Ethernet with fail-over WiFi, providing a more dependable connection.
- PoE Support: Utilizes PoE for efficient installation, powering the device through a network cable.
- Installation Code Knowledge: May need the existing system’s installation code for integrating specific functionalities.
- Community and Support: Access to Konnected’s community for setup help and system customization.
What’s in the Box?
Your Konnected Alarm Panel Pro Interface Kit includes the following items:
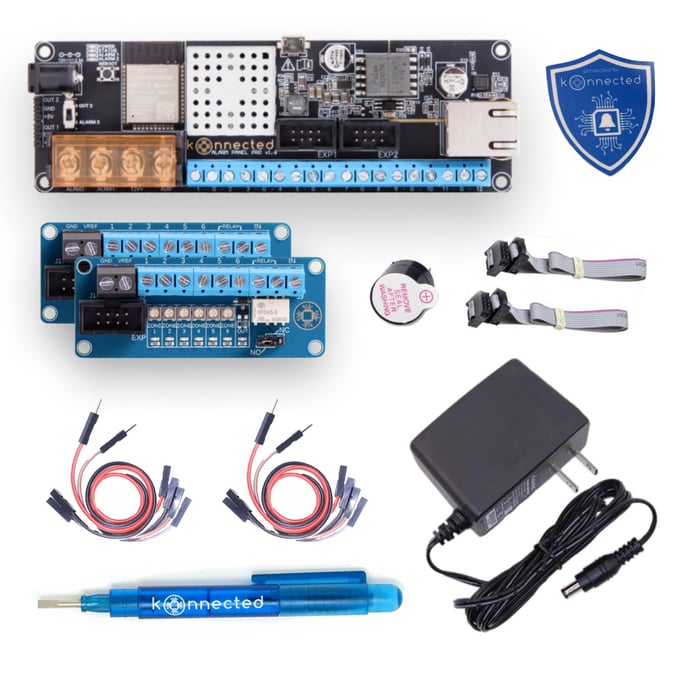
- 12-Zone Alarm Panel Pro Board
- 2x Interface Module w/ Built-In Relay
- Piezo Buzzer: Comes with jumper wires
- 12V Power Adapter: Provides power to the alarm panel if not using PoE
- Installation Accessories:
- Jumper Wires
- Konnected window sticker
- Sheet of wire labels for easy identification
- Adhesive-backed standoffs for mounting
- Mini screwdriver pen for assembly
- Welcome card containing instructions and information
Table of Contents 2
Setup Overview
The following steps provide an overview of the steps involved in wiring your Konnected Alarm Panel Pro Interface Kit in-parallel with your Traditional Alarm Panel
Installation Step 1 - Network Connection 3
Connecting to Your Network
Method #1: Konnected Mobile App (Recommended)
Before connecting via Ethernet, we recommend that you follow our Wi-Fi setup process to store your Wi-Fi credentials. This way, in the event of Ethernet connection issues, your Konnected Alarm Panel Pro will automatically fail-over to Wi-Fi.
- Download: Get the Konnected app for iOS or Android.
- scan the code below for iOS
- scan the code below for android
.png?width=150&height=150&name=adobe-express-qr-code%20(1).png)
- Power one Konnected board (steps will be repeated for additional boards) with the included power supply.
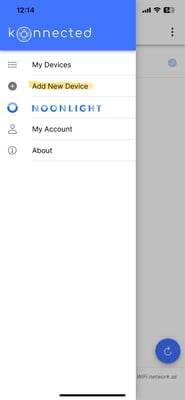
- Launch: Start the app and select 'Add New Device'.
.png?width=185&height=400&name=IMG_0440%20(1).png)
- Wi-Fi Setup: Follow on-screen instructions to enter WiFi details and finalize the setup.
.png?width=185&height=400&name=IMG_0442%20(1).png)
.png?width=185&height=400&name=IMG_0443%20(1).png)
.jpeg?width=185&height=400&name=IMG_0444%20(1).jpeg)
.png?width=185&height=400&name=IMG_0445%20(1).png)
.png?width=185&height=400&name=IMG_0446%20(1).png)
- Confirmation: Look for a non-blinking blue light on the board as a success indicator.
.png?width=185&height=400&name=IMG_0447%20(1).png)
- Multiple Boards: Repeat for each board you have.
Connecting via Ethernet
Once you've succesfully connected all of your Konnected Alarm Panel Pro boards via Wi-Fi, you can go ahead and connect Ethernet to them. If you are using PoE, you can remove the power supply... if you do not have PoE, keep using the power supply.
- Power and connect to Ethernet to one Konnected board (steps will be repeated for additional boards).
- Launch: Start the app and select 'Add New Device'.
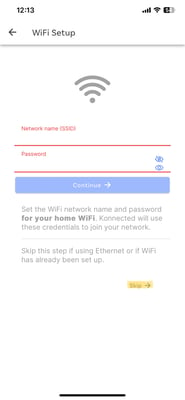
- Connection: Click "Skip" down in the bottom right corner to skip the Wi-Fi setup step since your board is connected via Ethernet.

Final Steps:
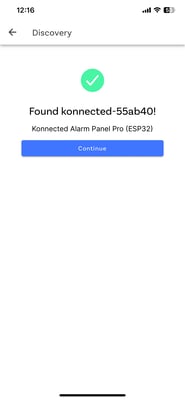
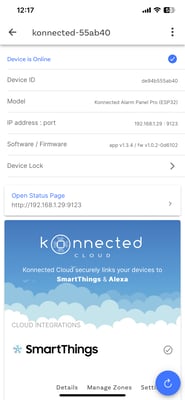
Once the network is connected, proceed with the device discovery via the Konnected Mobile App and integrate with SmartThings. We recommend completing the wiring of the board prior to integration steps, beyond an initial bench test.
Support and Resources
Should you encounter any issues, reach out for support:
- Submit a ticket or email us at help@konnected.io.
- Join our community forums for questions, support from other users, and inspiration.
Installation Step 2 - Wiring ID 4
Identifying Your Wiring
Proper identification and labeling of your existing wiring are paramount for successfully installing the Konnected Alarm Panel Conversion Kit. Follow these steps to ensure accuracy:
Documentation
- Photograph Your Setup: Capture high-quality images of your current alarm panel, wiring, and any zone lists or diagrams you have.

Labeling
- Use Provided Labels: Apply the included label stickers to each wire, noting their corresponding connections for easy reference.
Wire Identification
- Recognize Wire Types: For a comprehensive guide on wire labels such as AC +/-, Aux +/-, Bell +/-, Data, Zones, and Telephone, please refer to our detailed Identifying Your Wiring documentation.
- 2-Strand Wires: Typically used for sensors.
- 4-Strand Wires: Commonly connect motion detectors and keypads.
- Red/Black Wires: Usually indicate power connections.
AC Power Caution: Never attach AC power wires directly to the Konnected board.
Pre-Installation Testing
- Bench Test: Conduct a preliminary test of the Konnected device with your smart home platform to ensure integration and functionality.
Mounting and Positioning
Location
- Near Existing Wiring: Install the Konnected Panel, which can easily connect to your wired sensor wires or the original wiring panel.
Enclosure Options
- 3D Printed Enclosure: Consider a tailored enclosure for a secure and neat fit.
- Reuse Metal Enclosure: Alternatively, you may repurpose the enclosure of your old system. We've found that WiFi signal interference from metal enclosures is often insignificant.
Installation
- Mounting Options: Secure the device using magnetic or adhesive standoffs.
- WiFi Proximity: Position the panel within a good range of your router to ensure a robust WiFi signal.
- Interference Precautions: Avoid placing the device near high-voltage wiring to minimize potential interference.
Installation Step 3 - Wiring and Programming Guide 5
Before You Start
Watch the Demonstration Video
The above video is of our WiFi only Interface Kit installation, so the hardware in the video is slightly different than yours. Despite that, it should be very helpful and 95% applicable to your Pro Interface Kit installation.
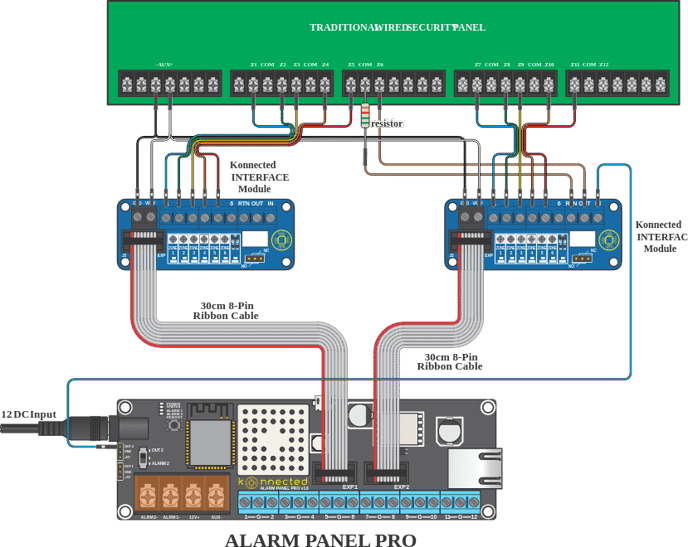
Inspect the Wiring Illustration
Getting Started
- Disconnect the power and backup battery from the traditional wired alarm system before you begin.
- Mount the Interface module near the wired zones of the traditional alarm panel, and connect using the included ribbon cable to the Konnected Alarm Panel / Add-on Panel / Pro. Each 6-zone Interface module requires a connection to a Konnected Alarm Panel board.
- Identify the AUX output (usually 12VDC) on the traditional alarm panel. Connect GND and VREF on the Interface module to AUX- and AUX+ on the traditional panel, respectively. This is necessary to provide an operating voltage reference to the Konnected device.
- Connect the zone inputs 1 - 6 on the Interface module to the wired zones (high side or zone side) on the traditional panel. Be careful to leave the existing wires intact!
- Power back on the traditional panel, reconnect the backup battery, and plug in the Konnected Alarm Panel. The green power light should illuminate on the Konnected Alarm Panel, and six orange zone lights should illuminate on the Interface module.
- If you have more additional zones to be monitored you will repeat this wiring minus the keyswitch/relay with the additional boards.
Tuning the Zone Inputs on the Interface Module
The inputs on the Interface module need to be tuned after installation to account for different resistance values on your wired sensors. This only needs to be done once.
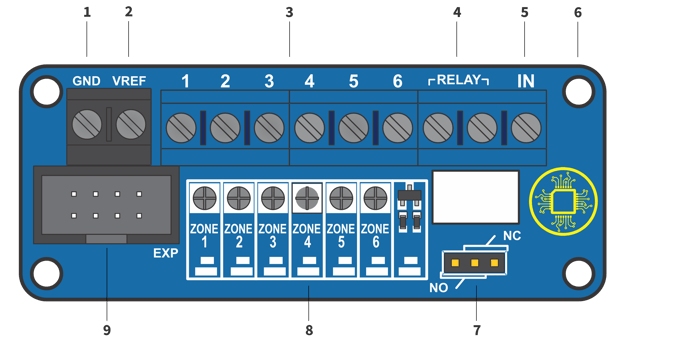
- When each zone is closed (i.e. the door/window is closed or motion is not detected), the orange LED corresponding to that zone should be illuminated.
- If the orange LED is not illuminated and the zone is closed, using a small screwdriver tip with very gentle pressure, turn the small dial above the zone number clockwise until the orange LED turns on.
- If the orange LED is illuminated, turn the dial counter-clockwise until the orange LED turns off, then gently turn it back clockwise until the orange LED just turns on again.
- The objective of tuning is to adjust the potentiometer dial until the orange LED is just past the threshold of on/off and remains on when the zone is closed.
- Ask a helper to open the zone (open the door/window or trip the motion) and observe the orange LED for that zone turning off when the zone is open, and turning back on when the zone is closed. When this happens without any flickering, the zone is properly tuned.
If your sensors do not have any resistors, the orange LED may never turn off when the zone is closed. In that case, turn the dial all the way counter-clockwise until it stops (don't force it!) and check that the orange LED turns off when the zone is opened.
Tuning with Programmable Outputs
Programmable outputs on most traditional alarm panels work the same way as wired zones. Program the output to signal various conditions with a low/high binary signal. For example "Armed" = high; "Disarmed" = low.
Connect the programmable output to a zone input on the Konnected Interface module, and tune it in the same way described above. The orange LED should remain on when the output is low, and should turn off when the output is high.
Wiring a Key Switch
Remotely arm and disarm a traditional wired alarm system using Konnected and a relay module to trigger a keyswitch zone.
To remotely arm/disarm using this method, you must have an unused zone on the traditional alarm panel that can be assigned as a keyswitch. This means you'll need the panel's installer code and a keypad capable of programming it.
A keyswitch zone type is supported by most traditional systems to arm/disarm the device with a momentary contact closure or opening. Think of a physical "key switch" that arms the alarm when you insert and turn a key. In this setup, we use a relay module, controlled by commands from your smart home platform to Konnected, to make that momentary connection.
- Identify an unused zone on the traditional alarm panel. Follow the alarm panel's programming guide to program this zone as a keyswitch zone.
- Connect the keyswitch zone and its adjacent COM terminal to the terminals marked RELAY on the Konnected Alarm Panel INTERFACE module.
- If the traditional panel requires a specific resistance value, wire the appropriate resistor inline with either the keyswitch zone. Not all panels require a resistor, and some can be programmed to work with or without one.
- Connect IN terminal on the INTERFACE module to the OUT terminal or pin on the Konnected Alarm Panel, or either OUT1 or OUT2 pin on the Alarm Panel Pro.
Configure the OUT zone
In your smart home platform, configure the OUT zone as a Switch or Momentary switch to activate the relay.
SmartThings: Use the Konnected app to set up
Built-in Dry Contact Relay
The Alarm Panel INTERFACE module v2.1 features a built-in dry contact relay that can be used to actuate a keyswitch or many other things:
- Garage door opener
- Electronic door strike
- LED light
- Sounder or strobe
- Any circuit up to 2A 30VDC or 0.3A 125VAC
The built-in relay is activated by applying 3.3V to the IN terminal, and is designed to be triggered from the Konnected Alarm Panel Add-on or Konnected Alarm Panel Pro OUT terminals.
Normally Open vs. Normally Closed
Depending on the capabilities of your traditional alarm panel, the keyswitch may need to be configured Normally Open (NO) or Normally Closed (NC). Normally open means that the circuit is open until the trigger voltage is applied to the IN terminal, which causes the relay to close.
Move the jumper cap on the Alarm Panel INTERFACE module to the NO or NC position to set the desired behavior.
Installation Step 10 - Powering 12
Powering Your Konnected Board
Choose from multiple power supply options to ensure your Konnected Alarm Panel operates efficiently.
Powering Options
- Existing Alarm System: Utilize the 12V DC power from your previous alarm system's power supply.
- Board Specifications: The board is compatible with a range of 6V to 24V DC or 5V via USB.
- Included Power Adapter: Plug the included power adapter into a standard outlet for a simple setup.
- USB Powering: While USB is an option for board power, it won't support high-draw devices like sensors or sirens.
- Multiple Boards: Utilize a splitter cable if you're setting up multiple boards.
- Reusing Wiring: If repurposing existing wiring, first ensure to disconnect the old system's power and battery.
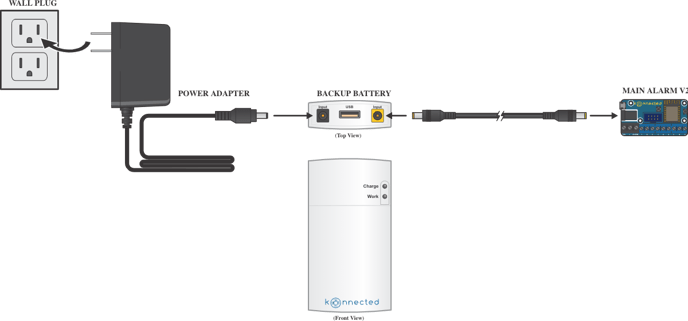
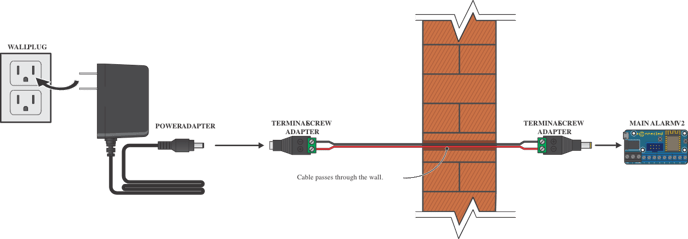
Important Notes
- Use terminal screw adapters for secure connections.
- Ensure to follow the Konnected Powering Your Board Guide for detailed instructions.
Installation Step 10 - Choose Your Platform 12
Choosing Your Smart Home Platform
Selecting the right smart home platform is crucial to harness the full capabilities of your Konnected system. Each platform offers distinct features tailored to different user needs, technical skills, and privacy preferences.
Smart Home Platform Options
- Samsung SmartThings

- User Experience: Ideal for those who value ease of setup and a wide range of device compatibility.
- Features: Offers a user-friendly interface, extensive device integration, and remote device access.
- Considerations: Internet-dependent with less customization.
- Home Assistant

- User Experience: Suited for users with technical know-how who prioritize extensive customization and privacy.
- Features: Offers local operation, strong community support, and frequent updates.
- Considerations: Requires additional hardware and comes with a steeper learning curve.
- Hubitat

- User Experience: Great for users seeking a balance between user-friendliness and privacy, with local control.
- Features: Ensures local processing, enhanced privacy, and supports a multitude of Zigbee and Z-Wave devices.
- Considerations: Has a more complex setup and fewer third-party integrations than larger platforms.
- Control4

- User Experience: Designed for users looking for a premium, professionally installed smart home system.
- Features: Provides professional installation, high customization, and extensive device support.
- Considerations: Involves higher costs and less flexibility for DIY changes.
Making Your Selection
Consider what's most important for your smart home experience:
- Ease of Use: Platforms like SmartThings provide straightforward cloud-based solutions.
- Customization and Privacy: Options like Home Assistant cater to those wanting a hands-on approach with more control.
- Local Control: Hubitat offers robust functionality without reliance on the cloud.
- Professional Setup: Control4 delivers a luxury experience with professional installation and support.
For a more detailed comparison and guidance on which platform aligns best with your objectives, visit Konnected's Smart Home Platform Guide.
SmartThings Integration - Connecting ST and Konnected Cloud 13
Connecting to SmartThings via Konnected
Integrating your Konnected Alarm Panel Conversion Kit with Samsung SmartThings combines your traditional security system with smart home functionality. Follow these detailed steps to set up your system:
Step 1: Install the Konnected Mobile App
- Download the Konnected app (if you haven't already) from the Apple App Store or Google Play Store.
- scan the code below for iOS

- scan the code below for android
.png?width=150&height=150&name=adobe-express-qr-code%20(1).png)
- Ensure your mobile phone is connected to your home's 2.4 GHz WiFi network.
Step 2: Connect Your First Device
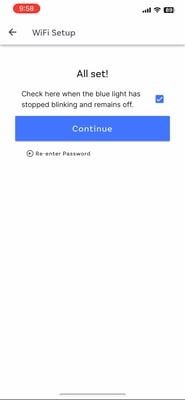
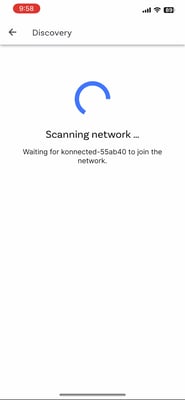
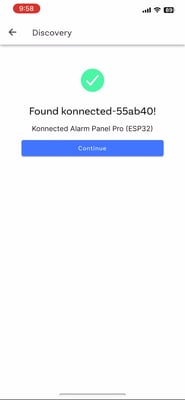
- With only one device connected to power, follow the in-app guide to "Add New Device." (skip this step if you've already done this in the "Connecting to Your Network" section)
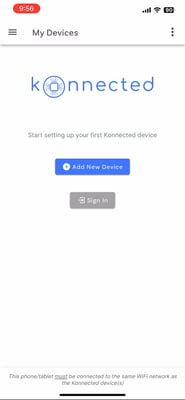
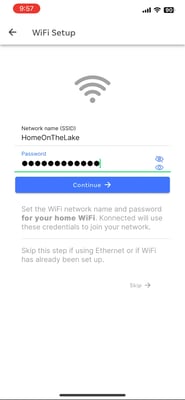
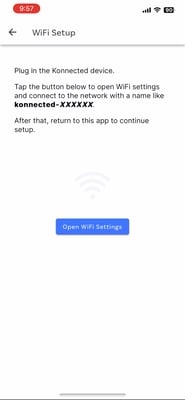
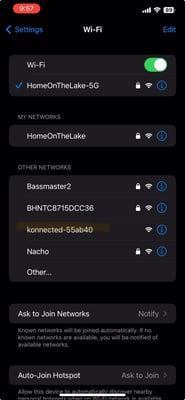
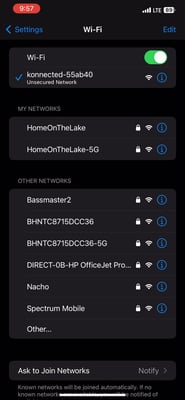
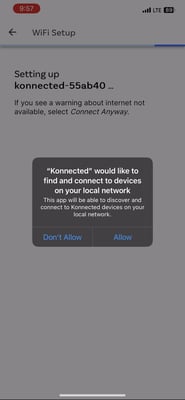
- Watch for the blue light on the device to blink and then stay solid, indicating a successful connection.
Step 3: Register the Device in the Konnected Cloud
- In the app, select your device and choose 'Register in Konnected Cloud.'
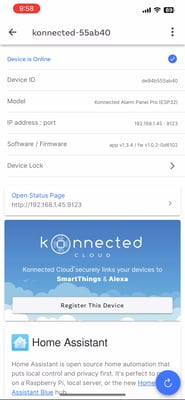
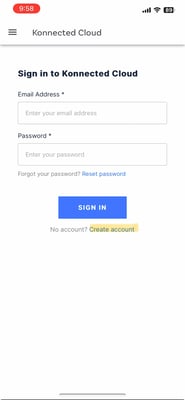
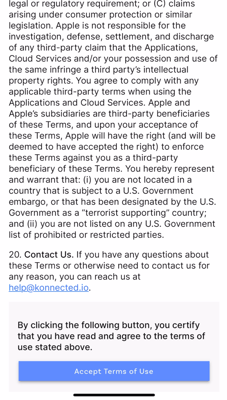
- Create a Konnected Cloud account or sign in, verifying your email as prompted.

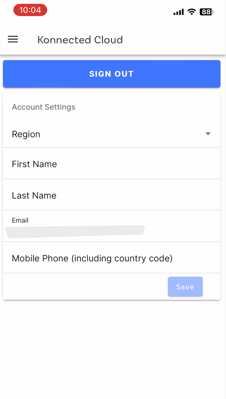
- Select the server region that corresponds with your SmartThings account's AWS (Amazon Web Services) region.
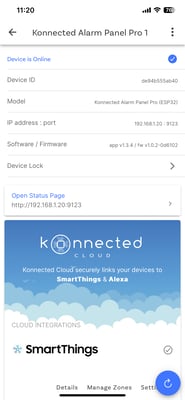
- Complete the registration to link your device to the cloud.
Step 4: Set Up Zones in Konnected Cloud
- Add and name each zone in the Konnected app, specifying types like "Door" or "Motion."
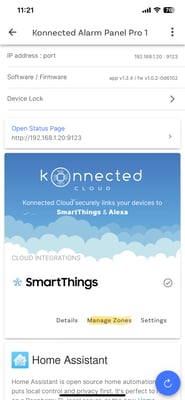
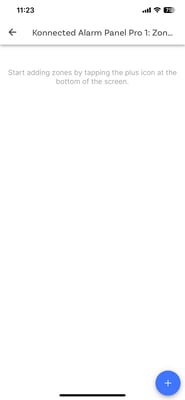
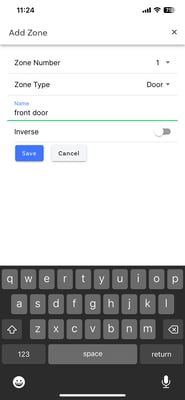
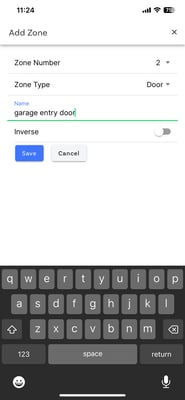
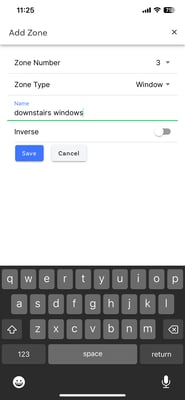
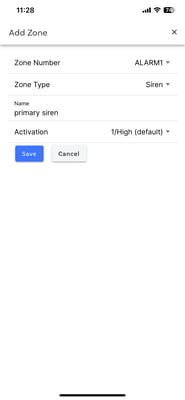
- Configure inverse states for NO detectors, duration for switches, or sensor polling intervals.
- Sync the configurations to your device by tapping 'Sync to Device.'
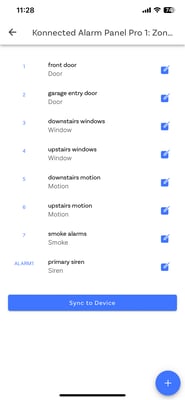
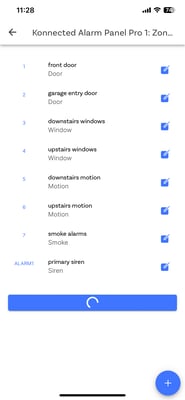
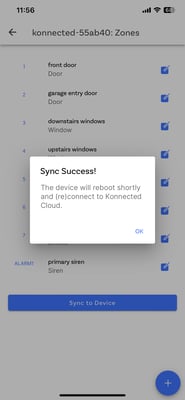

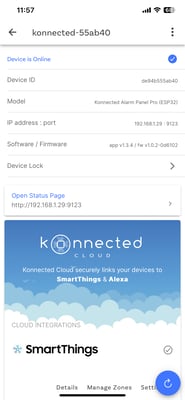
Repeat Steps 2-4 for each Konnected Board
Step 5: Link SmartThings to Konnected Cloud
- Open SmartThings, tap '+' to add a device, and search for Konnected under 'By Brand.'
.png?width=185&height=400&name=IMG_0471%20(1).png)
.png?width=185&height=400&name=IMG_0472%20(1).png)
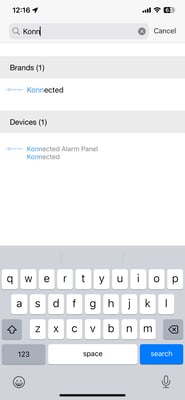
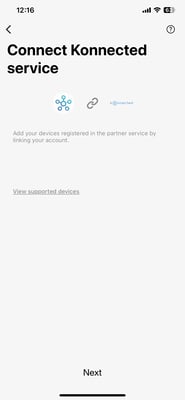
- Sign in to your Konnected Cloud account, ensuring no auto-capitalization errors in your credentials.
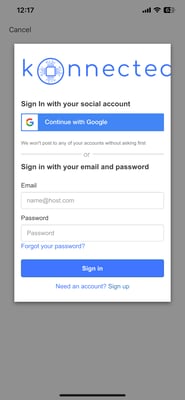
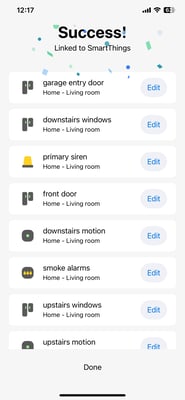
- Assign your Konnected sensors to a location and room in SmartThings.
- If any device shows 'Checking' or 'Offline,' reboot the Konnected board.
Step 6: Configure SmartThings Home Monitor
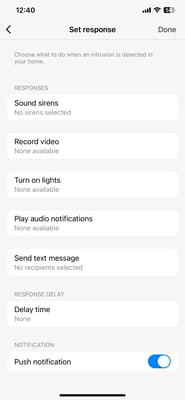
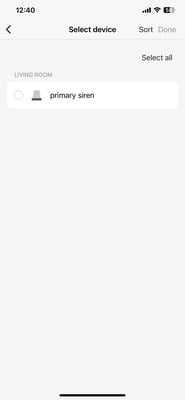
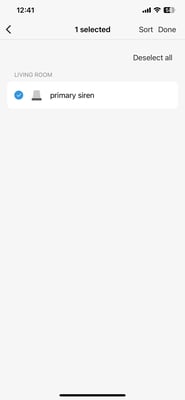
- Ensure that you have added all sensors and devices in the Konnected app, including sirens or strobes.
- In SmartThings, navigate to Life > Home Monitor to set up 'Armed Away' and 'Armed Stay' modes.
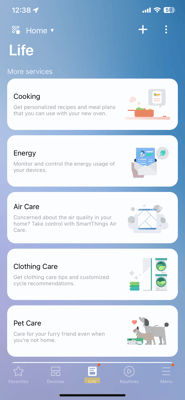
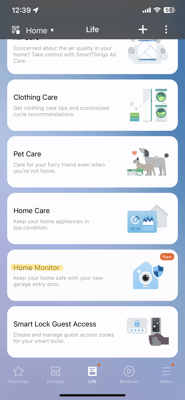
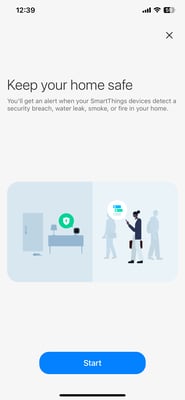
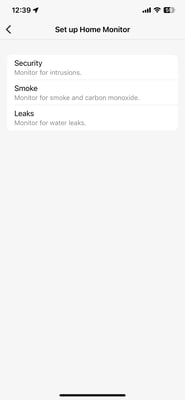
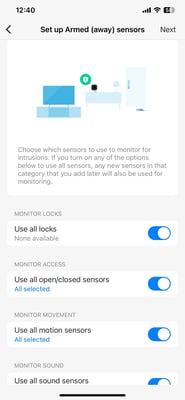
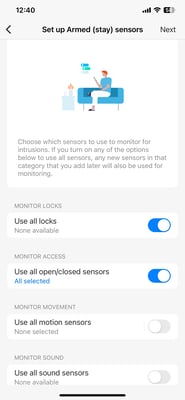
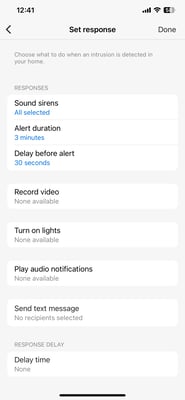
- Define responses for intrusions and set up siren delays as needed.
Step 7: Customize SmartThings Home Monitor
- Set up notifications for security, smoke, or water via Life > Home Monitor in SmartThings.
- Invite household members to the app for shared control.
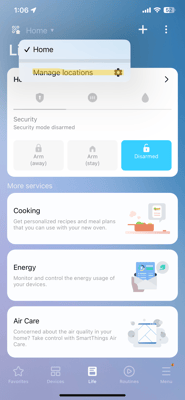
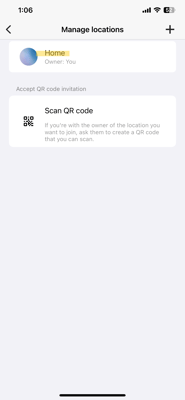
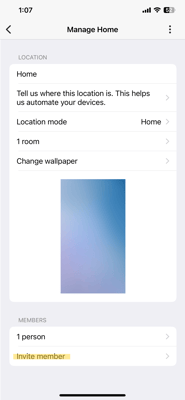
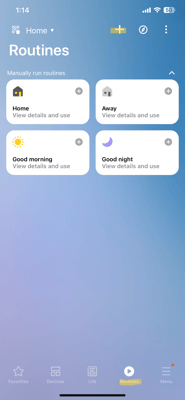
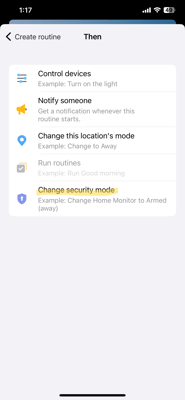
- Configure presence sensors and automate arming/disarming with Member Location as a trigger.
.png?width=185&height=400&name=IMG_0501%20(1).png)
.png?width=185&height=400&name=IMG_0502%20(1).png)
.png?width=185&height=400&name=IMG_0503%20(1).png)
.png?width=185&height=400&name=IMG_0505%20(1).png)
.png?width=185&height=400&name=IMG_0506%20(1).png)
.png?width=185&height=400&name=IMG_0507%20(1).png)
Step 8: Additional (Optional) Feature Setup
- For smoke and CO alerts, configure your sensors in Life > Home Monitor > Fire icon.
- For water leak monitoring, use the Droplet icon to set up leak detection.
- Link your Konnected setup to Noonlight for professional monitoring services.
- Specify which alerts Noonlight should monitor and conduct tests as needed.
Now, your Konnected system should be fully operational within SmartThings, enhancing your home's security and convenience. For any additional questions or detailed instructions, visit the Konnected SmartThings Setup Guide.
Home Assistant Integration 14
Integrating Konnected Alarm Panel Conversion Kit with Home Assistant via ESPHome
Unlock the potential of your Konnected Alarm Panel Conversion Kit by connecting it to Home Assistant, offering a powerful and customizable smart home experience.
1. Preparing for Installation
Before you begin, ensure you have the following:
- A computer or laptop with Chrome or Edge browser installed.
- A data-ready Micro-USB cable.
- Access to your home's WiFi network or an Ethernet connection if using the Alarm Panel Pro.
2. Flashing ESPHome Firmware
New in 2023, Konnected provides pre-built ESPHome firmware for an easy start.
Flashing Steps:
- Access Flashing Tool: Visit install.konnected.io/esphome on your browser.
- Connect Device: Plug in your Konnected device using the Micro-USB cable.
- Choose Firmware: Select the appropriate build from the drop-down menu.
- Install Firmware: Click 'Connect', choose the device serial port, then click 'Install Konnected Firmware for ESPHome'.
3. Connecting to WiFi
For WiFi-enabled devices, follow these steps to connect to your network:
- Power Device: Plug in the Konnected device using the power adapter or a powered USB port.
- Join Device Network: On your computer or mobile device, connect to the network named 'alarm-panel-xxxxx'.
- Select WiFi Network: A pop-up should appear for WiFi configuration (or navigate to 192.168.4.1).
- Enter WiFi Details: Choose your WiFi SSID, enter the password, and save.
Note: The Konnected App is not required for ESPHome & Home Assistant setup.
4. Adding Device to Home Assistant
Home Assistant's ESPHome integration should automatically discover the device on the network.
Adding Steps:
- Check Notifications: Look for 'New Devices Discovered' or go to 'Settings' > 'Devices & Services'.
- Configure Device: Click on the discovered ESPHome device and then 'Configure'.
- Assign to Area: (Optional) Add the device to an Area in Home Assistant.
- Finish: Click 'Finish' to add the Konnected device and its zones.
5. Creating Your Alarm System
Utilize Home Assistant's alarm control panel and automations, or install the Alarmo integration for a comprehensive alarm system.
With Alarmo:
- Alarmo Integration: Provides a full alarm system setup within the browser.
- Installation: For Alarmo installation instructions, visit Alarmo on GitHub.
6. Renaming Zones
After integration, customize zone names in Home Assistant to reflect their purpose in your home.
Renaming Steps:
- Access Devices: In Home Assistant, navigate to 'Settings' > 'Devices & Services'.
- Edit Zones: Click on your Konnected device and rename each zone according to its location or sensor type.
Conclusion
Your Konnected Alarm Panel Conversion Kit is now successfully integrated with Home Assistant, providing you with a flexible and intelligent security system. Regularly maintain and update your setup to keep it running smoothly.
For additional support and resources, visit the Konnected Knowledge Base.
Hubitat Integration 14
Integrating Konnected Alarm Panel Conversion Kit with Hubitat
Connect your Konnected Alarm Panel to Hubitat for localized control and automation of your home security system.
Preparation
- Hubitat Elevation Hub: Ensure you have the Hubitat Elevation hub set up and running on your network.
- Latest Hubitat Firmware: Confirm that your Hubitat hub is updated to the latest firmware version for optimal compatibility.
Installation
- Install Konnected Drivers: Access your Hubitat dashboard and navigate to 'Drivers Code'. Import the Konnected drivers specifically designed for Hubitat from the Konnected GitHub repository or from the provided URL in the Konnected integration documentation.
- Add Konnected Device: Go to 'Devices' and click on 'Discover Devices'. Select 'LAN' and allow Hubitat to find your Konnected Alarm Panel on the network.
- Configure Network Settings: If your device isn't discovered automatically, you may need to manually configure the network settings. This involves assigning a static IP to the Konnected device and inputting it directly into Hubitat.
Device Setup
- Assign Zones: Once the device is added, you'll need to assign each zone on the Konnected Alarm Panel to corresponding sensors in your home (doors, windows, motion, etc.).
- Name Your Devices: For easy identification, name each sensor appropriately in Hubitat, such as 'Front Door', 'Living Room Window', etc.
- Create Automation Rules: Utilize Hubitat's built-in apps like Rule Machine or HSM (Hubitat Safety Monitor) to create automation rules for your security devices. You can set up alerts, sirens, or other actions based on sensor triggers.
Testing and Validation
- Test Each Sensor: Ensure each sensor is working correctly by triggering it and checking if the corresponding action is carried out in Hubitat.
- Validate Automations: Test your automation rules to make sure they perform as expected in different scenarios.
Final Steps
- Save Configuration: After testing, save your configuration and ensure that all changes are backed up.
- Mounting: Securely mount the Konnected Alarm Panel in a central location for best connectivity to all sensors.
For further assistance and advanced setup options, please refer to the detailed Hubitat Integration Guide on the Konnected support site.
