Installing Noonlight for Hubitat involves importing the open source app and driver into your Hubitat hub and then completing a one-time account setup. At the end of this process, a device called Noonlight will appear in your list of devices.
- Open your Hubitat dashboard and click on Apps Code on the menu bar and then click on New App.
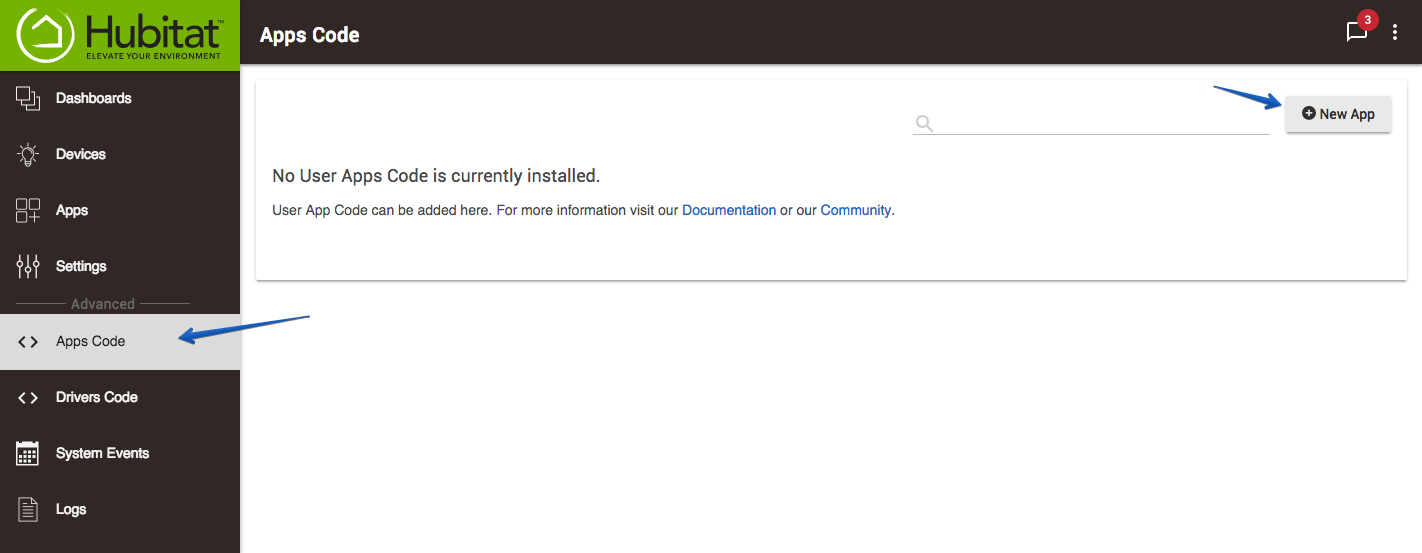
- Click on the Import button at the top of the screen, then paste the following URL in the field that pops up:
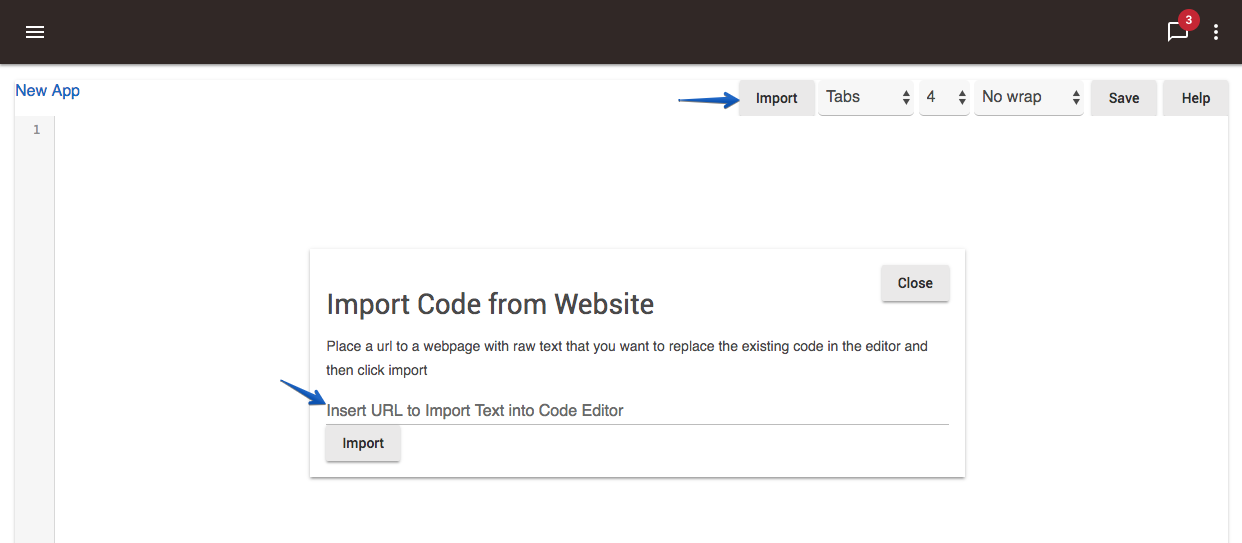
- Now click Import and the app code will be imported. Then click Save to create the app.
- Next, click on the menu icon and go to Drivers Code, then click New Driver.
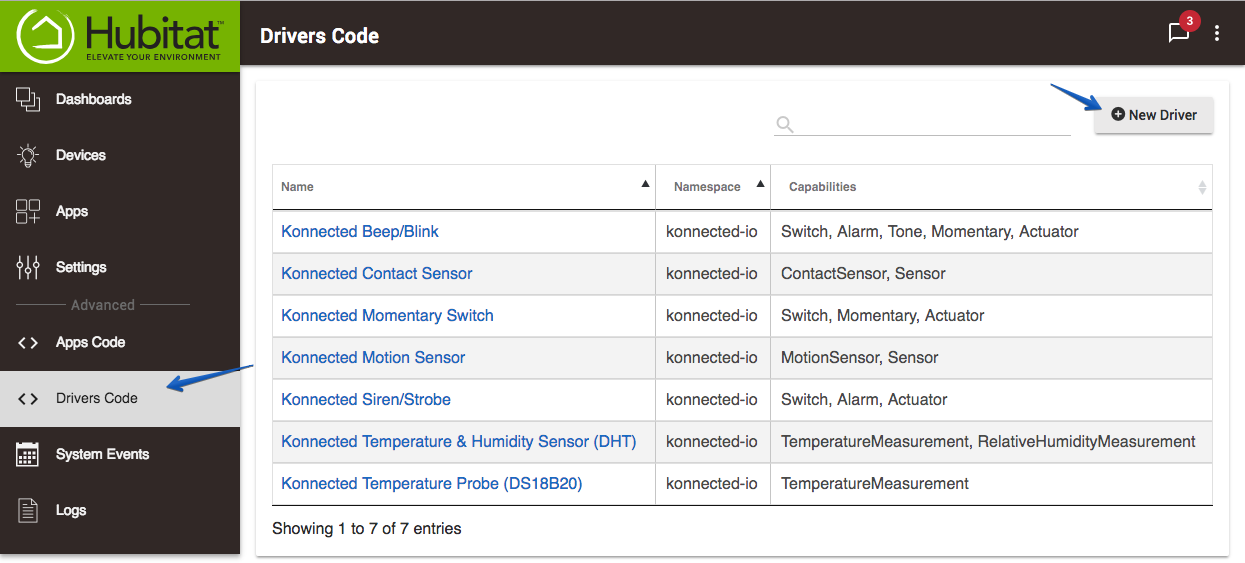
- Again, click on the Import button at the top of the screen, then paste the following URL in the field that pops up:
https://raw.githubusercontent.com/konnected-io/noonlight-hubitat/master/device/Noonlight-Alarm.groovy - Click the Import button to import the driver, then Save.
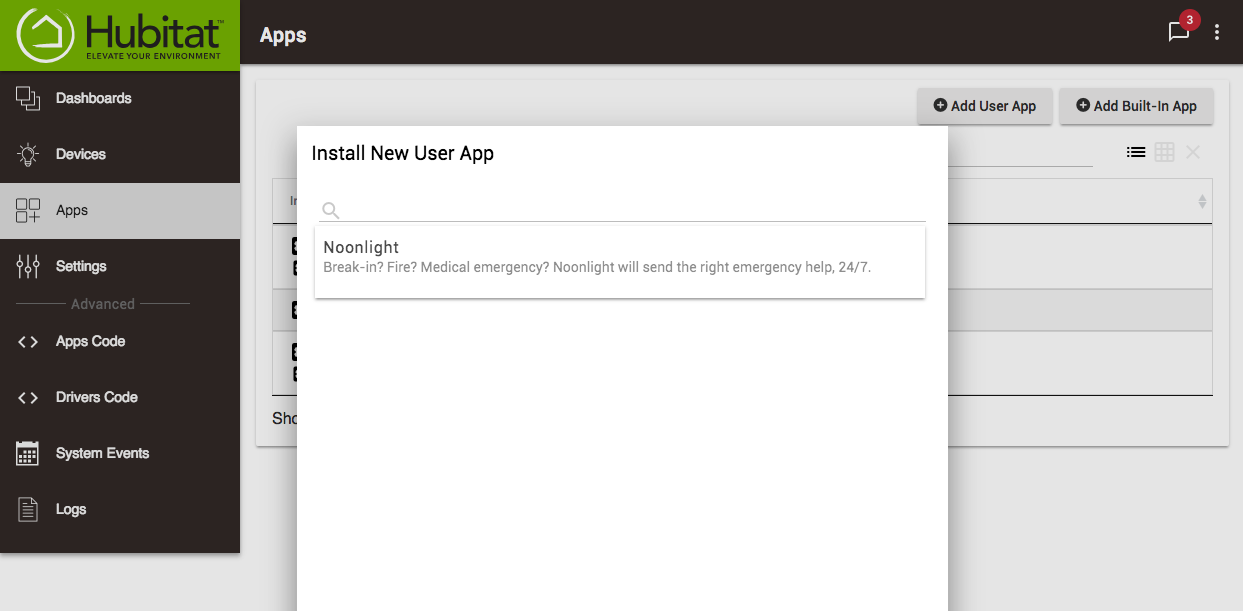
- Now go to Apps on the main menu to install the app that we just imported.
- Click Add User App then click on Noonlight in the list of apps that pops up.
- Click on the Connect Noonlight button to open a new browser tab and create or link your Noonlight account. During this flow Noonlight will verify your mobile phone number, ask you to set a PIN, and collect payment information.
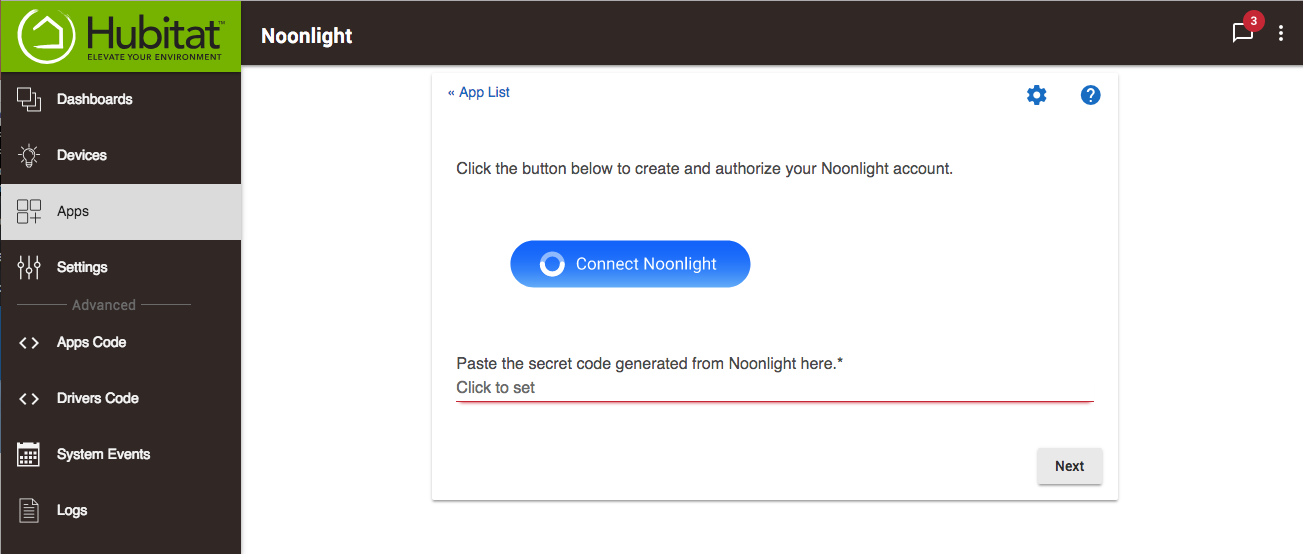
-
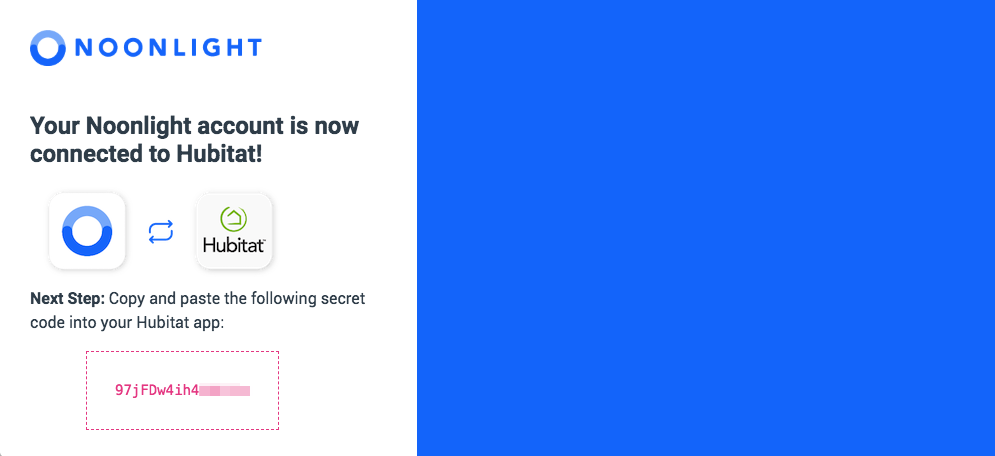
Once you've completed the Noonlight setup, you will be given a 16-character secret code to copy and paste back to Hubitat then click Next. Once you've done that you can close the Noonlight browser tab.
-
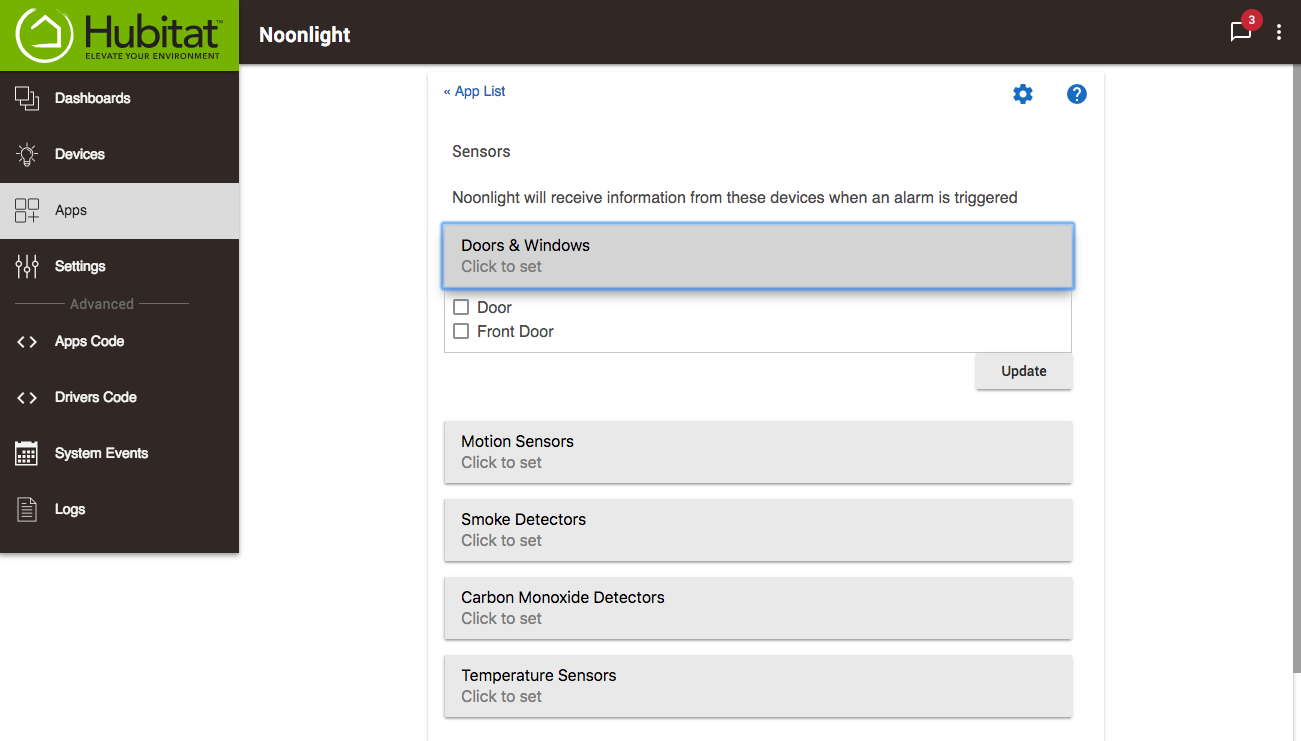
On the next screen you can select any sensors and devices that you want to share with Noonlight dispatchers in the event of an emergency. We recommend that you select all of your security related sensors, including door, window, motion and smoke/CO sensors. You can also select presence sensors so that Noonlight dispatchers can know if anybody is home. This step is optional; you can still use Noonlight without sharing the details of specific sensors.
-
Scroll further down the page and click the link titled Click here to check your geo-location setting in Google Maps. This will open a new browser tab with your home location pinpointed in Google Maps. Verify that your address is correct -- if not you will need to update it later in Settings -> Location and Modes.
-
Tap Done at the bottom of the page to complete installation.
-
A switch/alarm named Noonlight should now appear in your devices list.
Next Step: Set up Hubitat Safety Monitor with Noonlight