Discover & Setup Konnected Alarm Panels in Control4
Getting Started with Konnected and Control4
New in 2024! Konnected GDO's (White v2, and blaQ) now integrate with Control 4. The driver was developed by Chowmain Software, and it can be purchased from their website here.
This step-by-step guide assumes that you are a Control4 dealer/installer and have access to Composer Pro, Control4's Windows application for installing and configuring a Control4 controller.
- Open Control4 Composer Pro and connect to an existing Control4 controller for which you wish to install Konnected. The Konnected device(s) must be installed on the same local area network (LAN) and subnet as the Control4 controller.
- Download the Konnected Alarm Panel Universal driver:
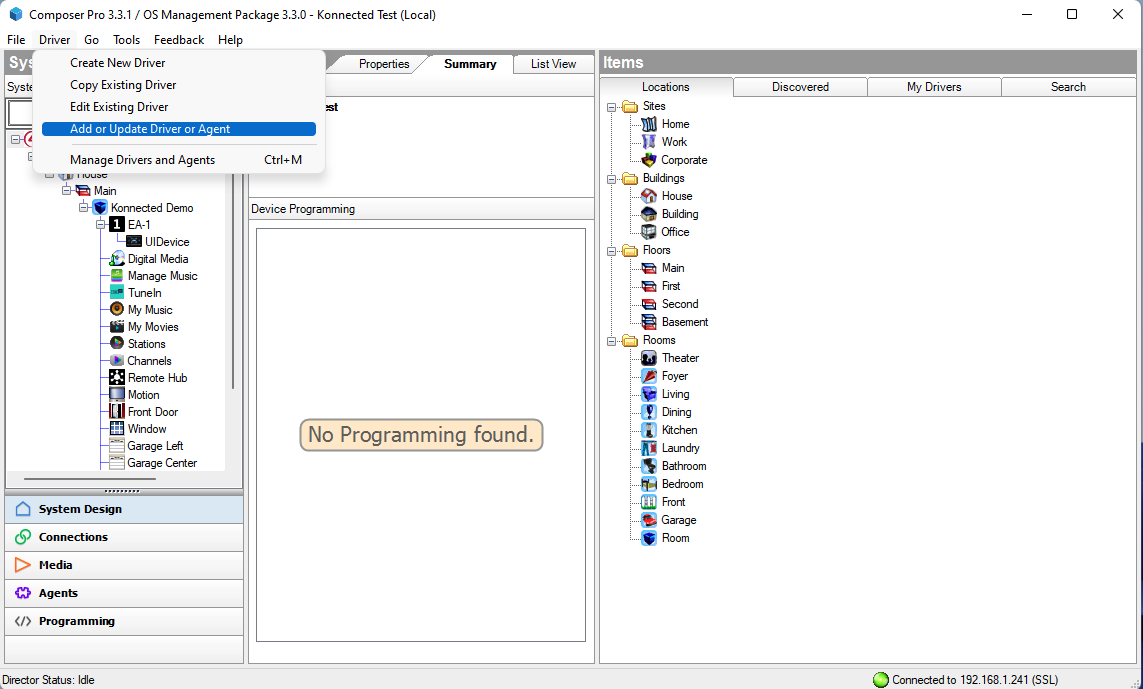
- In Composer Pro, go to Driver > Add or Update Driver or Agent then select the konnected-alarm-panel.c4z that was just downloaded to install it.
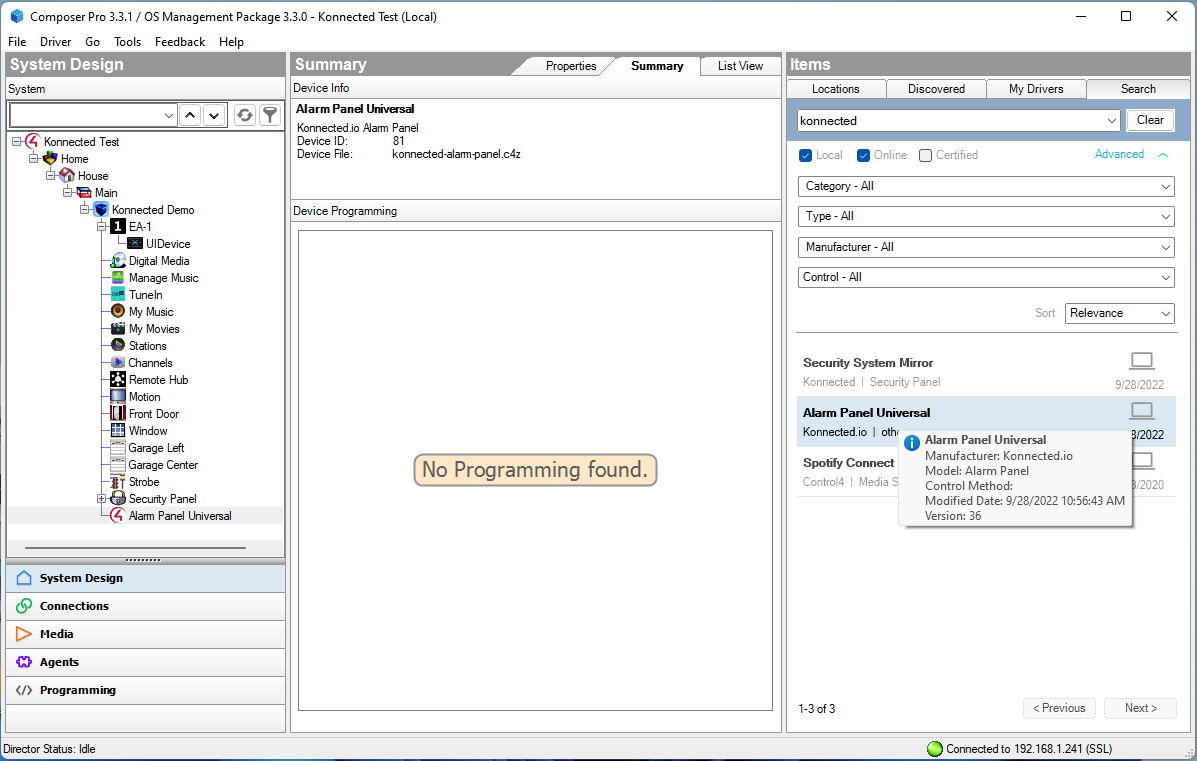
- Find the newly installed Alarm Panel Universal driver using the Search tab in Composer Pro and double-click on it. The instance represents a single Konnected Alarm Panel or Alarm Panel Pro. To install multiple Alarm Panel products, repeat this step to create more instances of the Alarm Panel driver in your project. You may want to rename the driver instance to identify each panel.
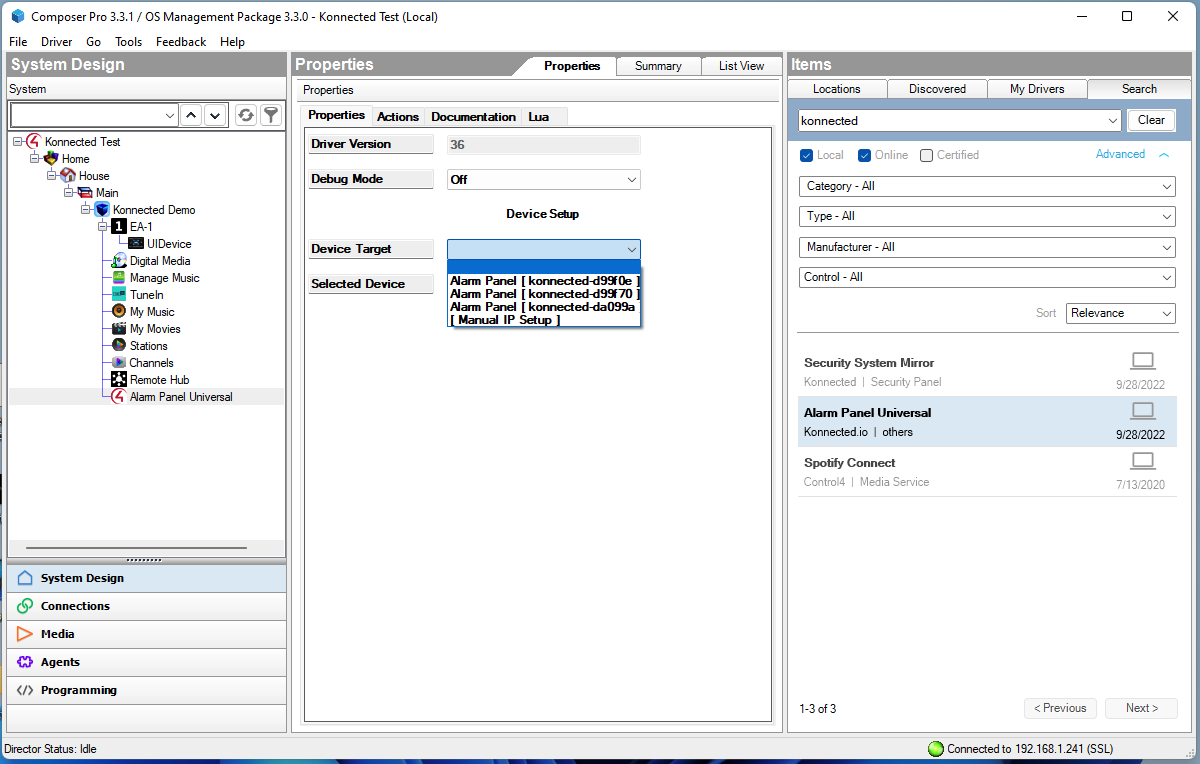
- Set up the connection to an Alarm Panel device by selecting the Alarm Panel Universal instance in System Design, going to the Properties tab. Konnected devices on the network will automatically appear in the drop-down Device Target menu. Select the Konnected device to bind to this driver instance or select Manual IP Setup to manually enter the IP Address and port of a Konnected device if it is not able to be auto-discovered, and click Set.
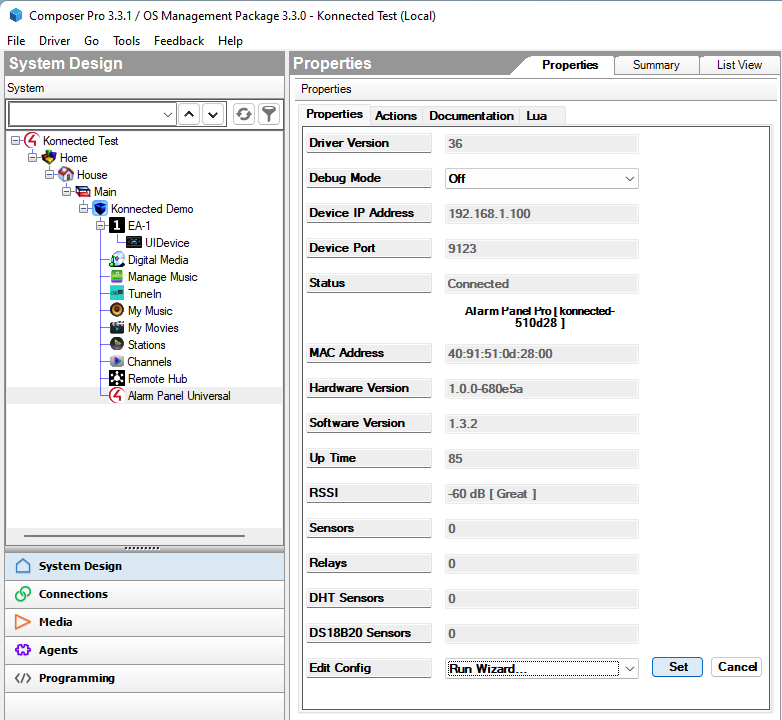
- The device is now bound to this driver instance and is connected! Now configure the zones by running the "Wizard." Select Run Wizard and click Set.
- Select a zone to configure and click Set.
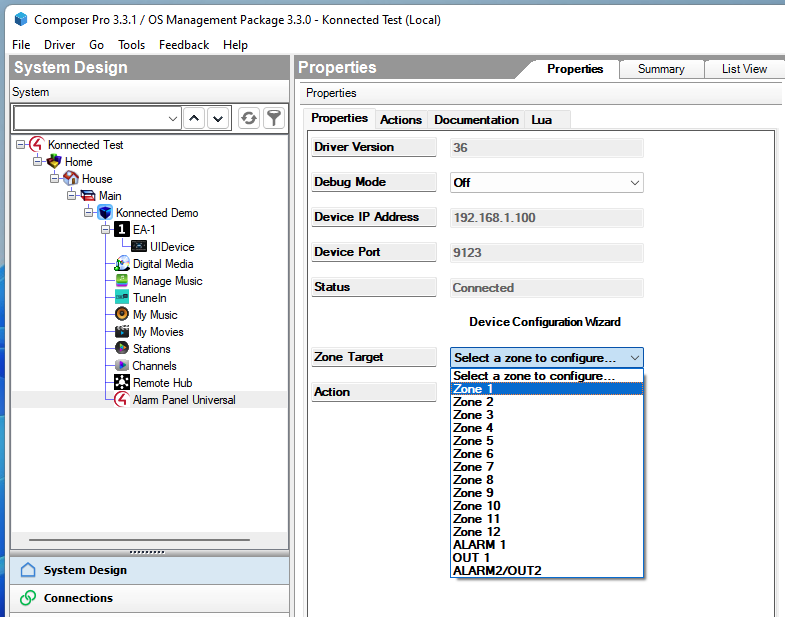
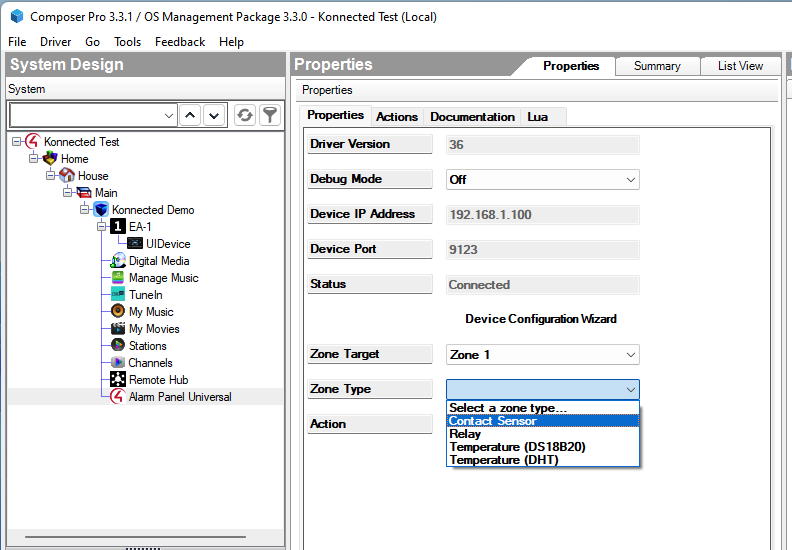
- Select the zone type and click Set.
- Type a zone name and click Set.
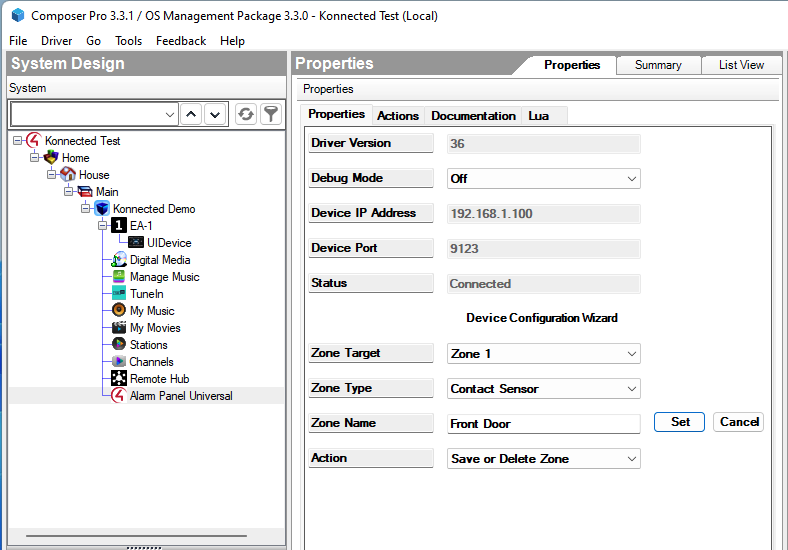
- Select Save from the Action drop-down and click Set to save the zone. Repeat the Run Wizard process for each zone that you need to configure. To check the zone config stored in the Control4 driver, click the Actions tab then click Print Config.
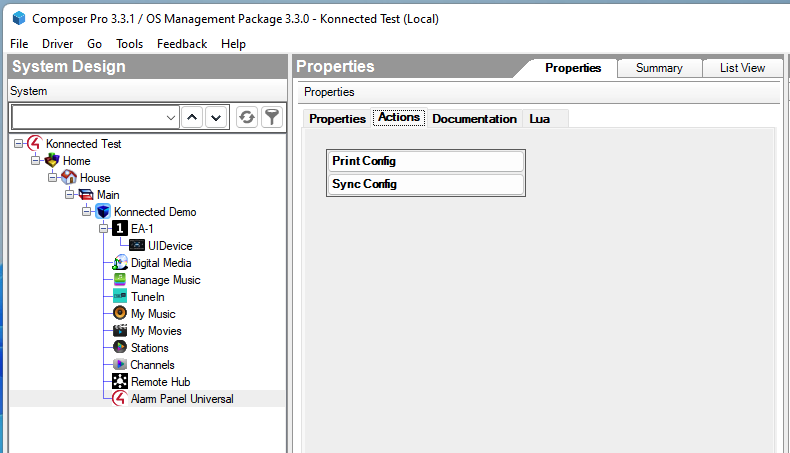
- Then click the Lua tab to view the config output.
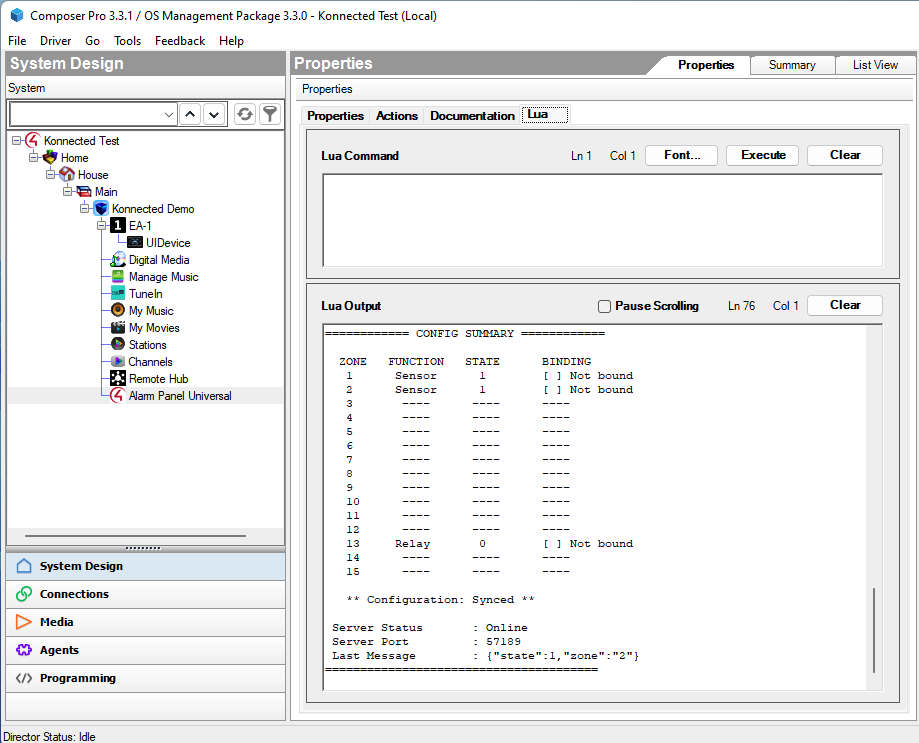
- Once all desired zones are set up, click the Sync Config button on the Lua tab. This syncs the zone setup from Control4 to the Konnected device over the network. Your Konnected device is now provisioned to Control4!
Next Step: Mapping Konnected Zones to Control4 Devices