Adopt a Konnected device running ESPHome into ESPHome Dashboard
Customize and secure your ESPHome based Konnected device.
Konnected's pre-built ESPHome firmwares for our devices work out-of-the-box with Home Assistant using the most common basic configurations and settings. While some customization can be done in Home Assistant, for complete customization and security of your Konnected device running ESPHome, we recommend that you adopt your ESPHome devices into ESPHome dashboard, and use ESPHome's tools to install a customized firmware build specifically for your device.
This article will guide you in setting up ESPHome Dashboard and adopting your Konnected device.
ESPHome Dashboard
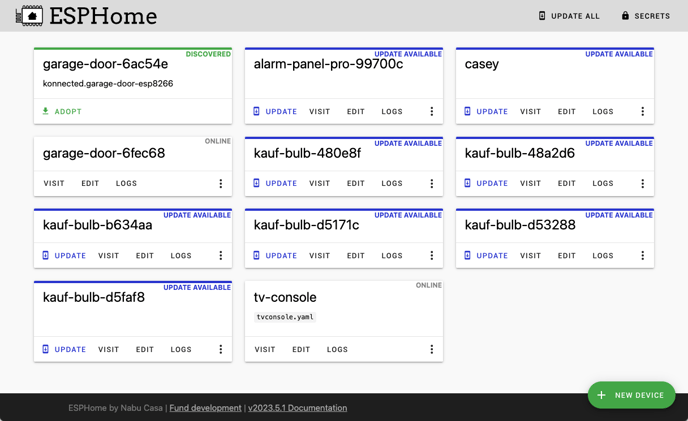 ESPHome Dashboard is a web-based user interface to manage, update, and configure ESPHome devices on your network. There are two common ways to install/use ESPHome Dashboard:
Install ESPHome Dashboard as a Home Assistant Add-on
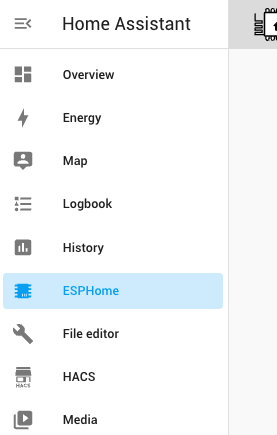 The simplest way to get started with ESPHome Dashboard is by installing the Add-on to Home Assistant. Most users who are running Home Assistant Operating System can use this method to install ESPHome Dashboard on their Home Assistant hardware, making an ESPHome dashboard tab available within Home Assistant.
In Home Assistant, go to Settings > Add-ons > +Add-on Store and search for ESPHome.
if you do not have the official ESPHome add-on repository added you can add with this button:
After it's installed (it may take a while), enable the link in the Home Assistant sidebar by enabling the Show in sidebar setting. To launch the dashboard, click Start then Open Web UI.
The downside of running ESPHome Dashboard on your Home Assistant hardware is that it can be slow to compile firmware updates, especially on a Raspberry Pi or similar hardware. Also, your ESPHome device configuration files will be stored on the Home Assistant device's filesystem, where it's up to you to make sure they're secure and backed up.
Install ESPHome Dashboard on your computer
ESPHome can also be installed on your computer, where you can run ESPHome dashboard locally as needed. Using this approach, all of your ESPHome firmware configuration files will be saved on your computer's hard drive.
On a Mac:
ESPHome can be installed on a Mac using Homebrew:
# Create a folder on your Mac to store your ESPHome configs
> mkdir ~/esphome-configs

> brew install esphome
> cd ~/esphome-configs
> esphome dashboard --open-ui .
The last line above starts the ESPHome dashboard web service on your computer and opens the UI in your default browser.
On Windows:
Follow these steps for Installing ESPHome on Windows, then in the terminal, enter:
> esphome dashboard --open-ui .
Discover and Adopt the Konnected Device
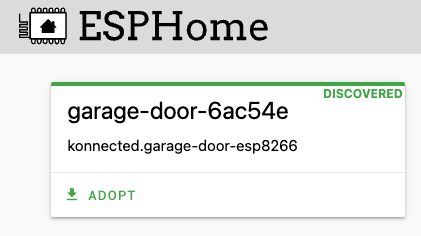 Once ESPHome Dashboard is installed and running, and your Konnected Device running ESPHome is connected to your network, ESPHome Dashboard should automatically discover the device. Click Adopt to adopt the device and begin customization.
You may be prompted to enter your Wi-Fi credentials.
You will also be prompted to use an auto-generated API key for Home Assistant. We strongly recommend that you use the auto-generated key and copy it into Home Assistant to secure the communication between the device and Home Assistant.
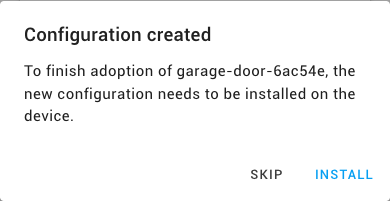 Finally, your ESPHome configuration file will be created and you'll be prompted to Install the new configuration. Clicking Install will start the build and over-the-air update of a new firmware compiled specifically for your device. Click Skip to skip the firmware build for now if you want to make more customizations first.
The Install process may take a long time, especially on a Raspberry Pi or similar hardware.
Adding the API Key to Home Assistant
After setting a unique API Key for your device to communicate with Home Assistant, you must copy the API key into Home Assistant to re-enable communication.
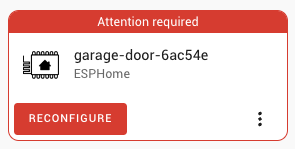 In Home Assistant, go to Settings > Devices & Services. You should see a red tile prompting you to Reconfigure your ESPHome device.
Click Reconfigure then paste the API Key created in the adoption step here. If you didn't copy the API key previously, go back to ESPHome Dashboard, click the three-dots menu next to the device then Show API Key.